
As I’ve mentioned before, I’m experimenting with speed/contrast/Xpress paints, call them what you will, in order to try and increase my output of minis, and I thought this would be a good point to show you two of the main methods I’ve been using.
Speed paints are designed to be used over a coat of white or light coloured primer but, of course, there are a lot more ways to use them than that, and the ‘Slapchop method’ is something that has become popular with the emergence of these paints.
In ‘Slapchop’ you prime black and then drybrush in grey and then white, building up the contrast from shadows to highlights. This can also be done by Zenithal highlighting using an airbrush but that’s not the technique I used here.
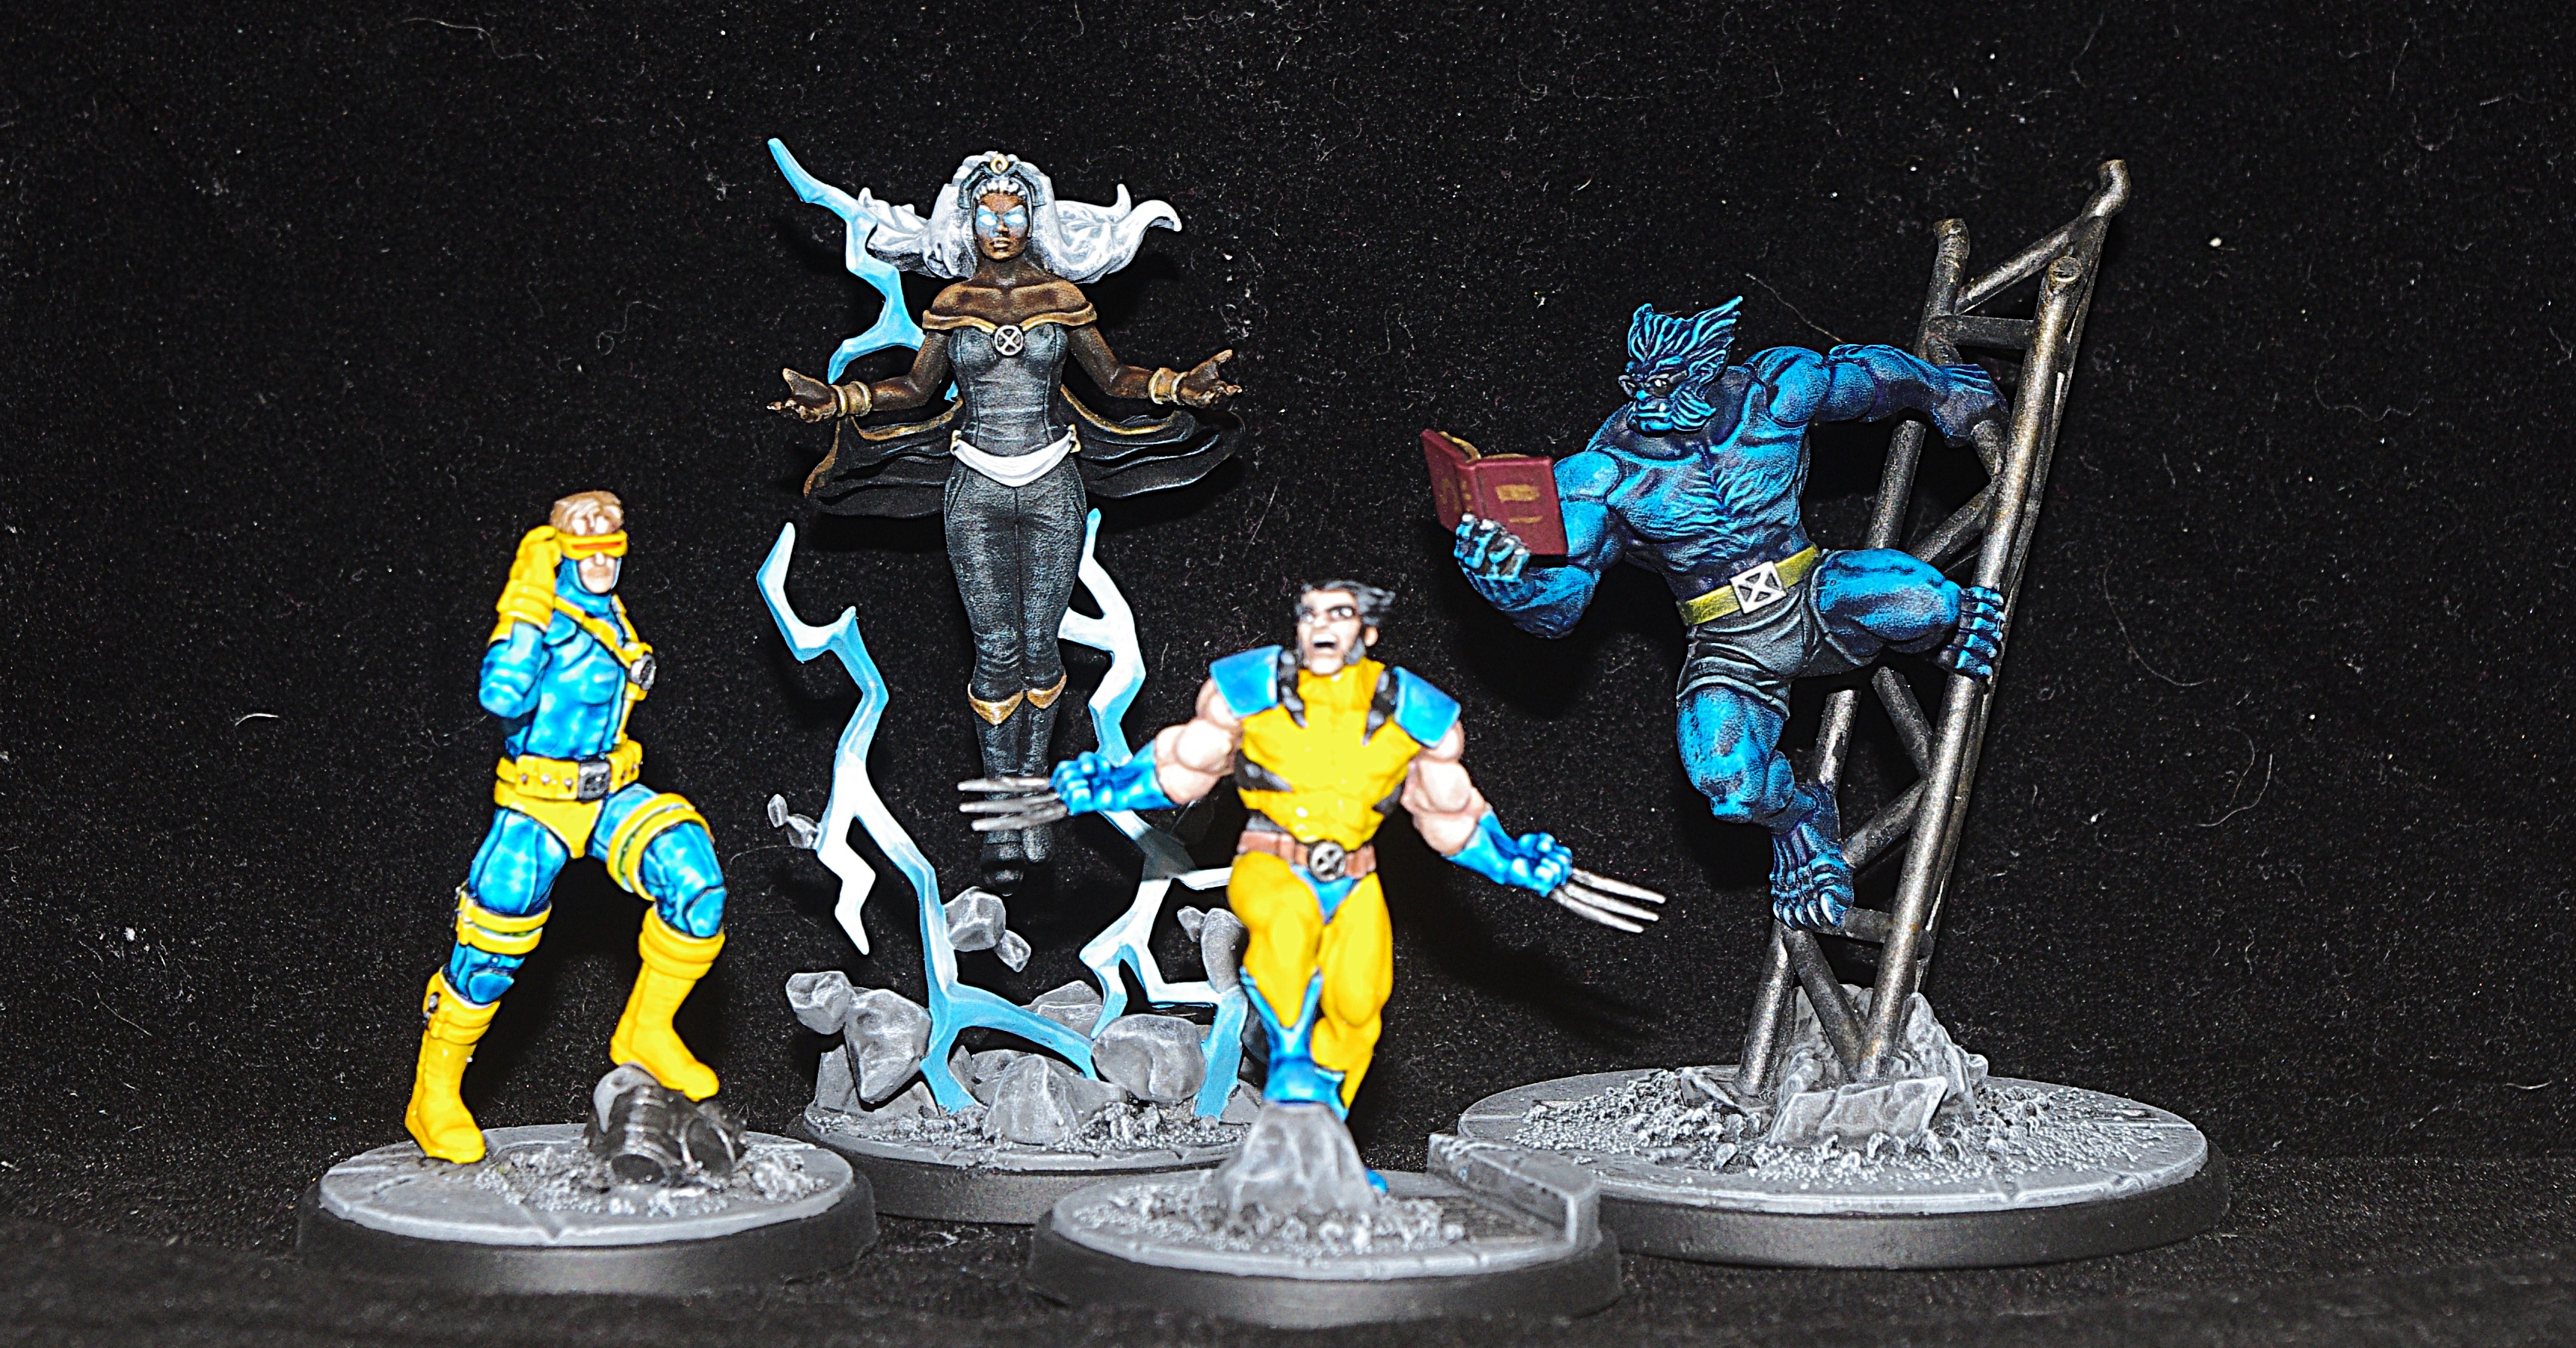
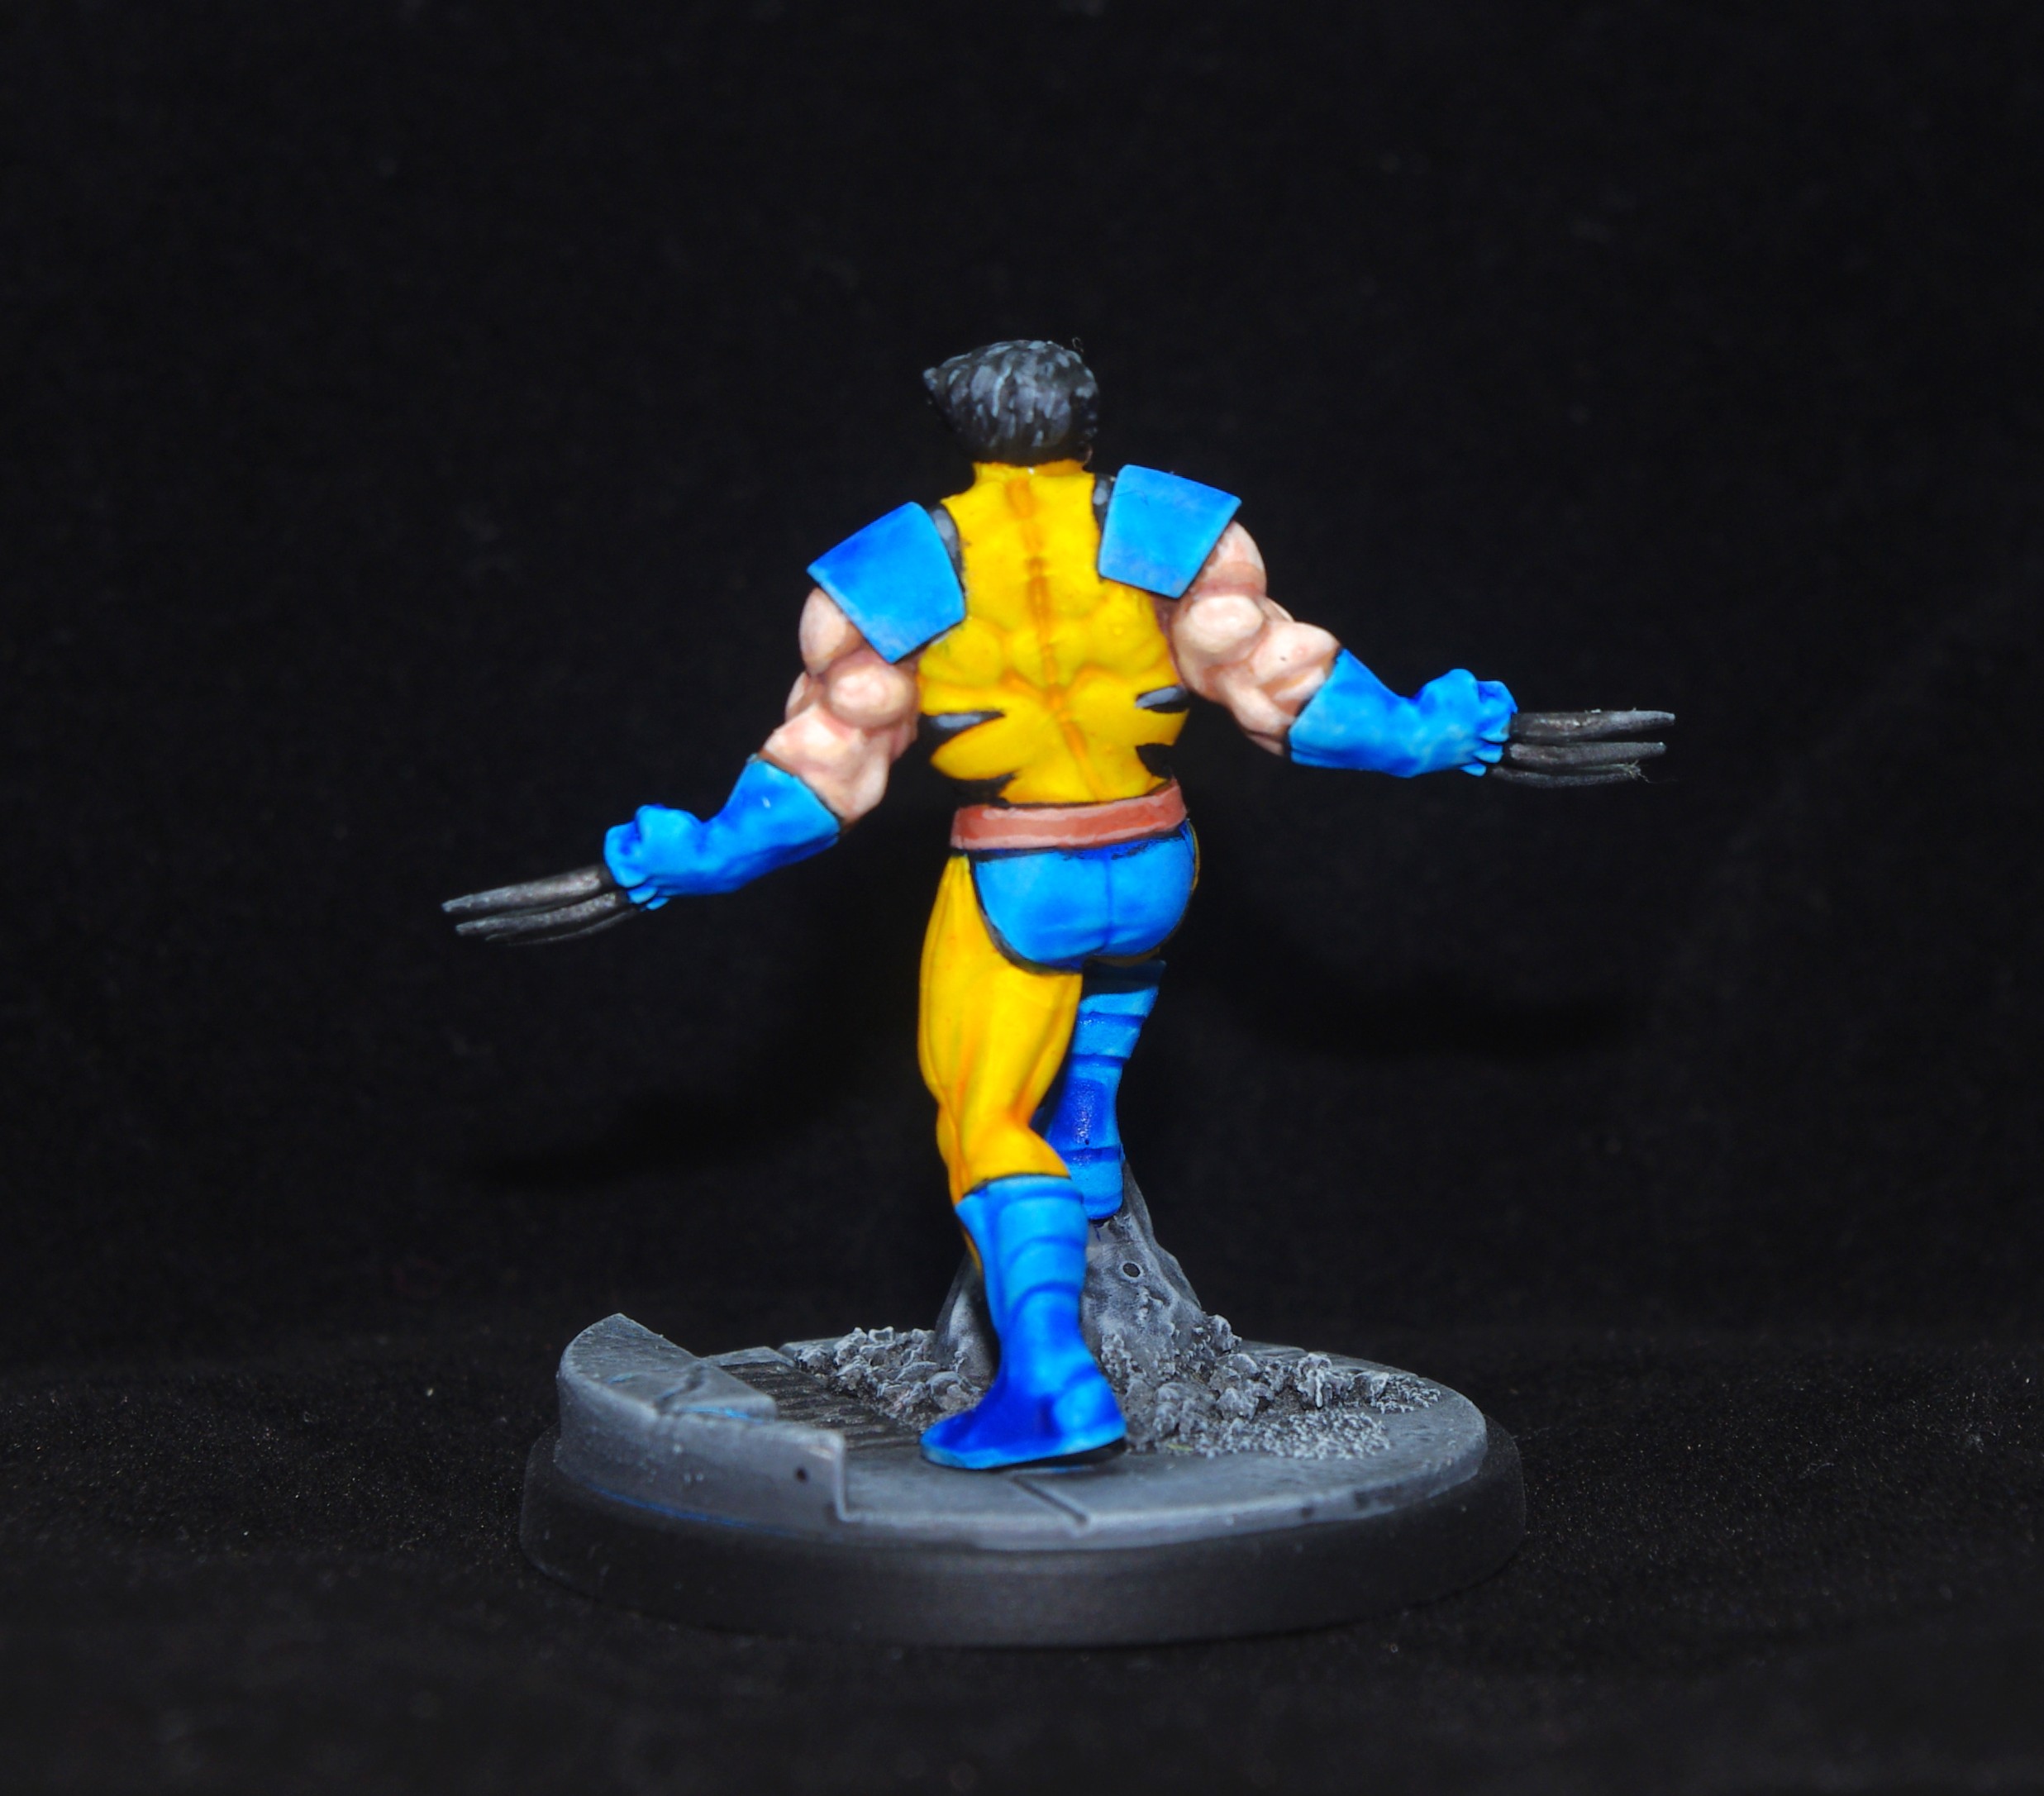
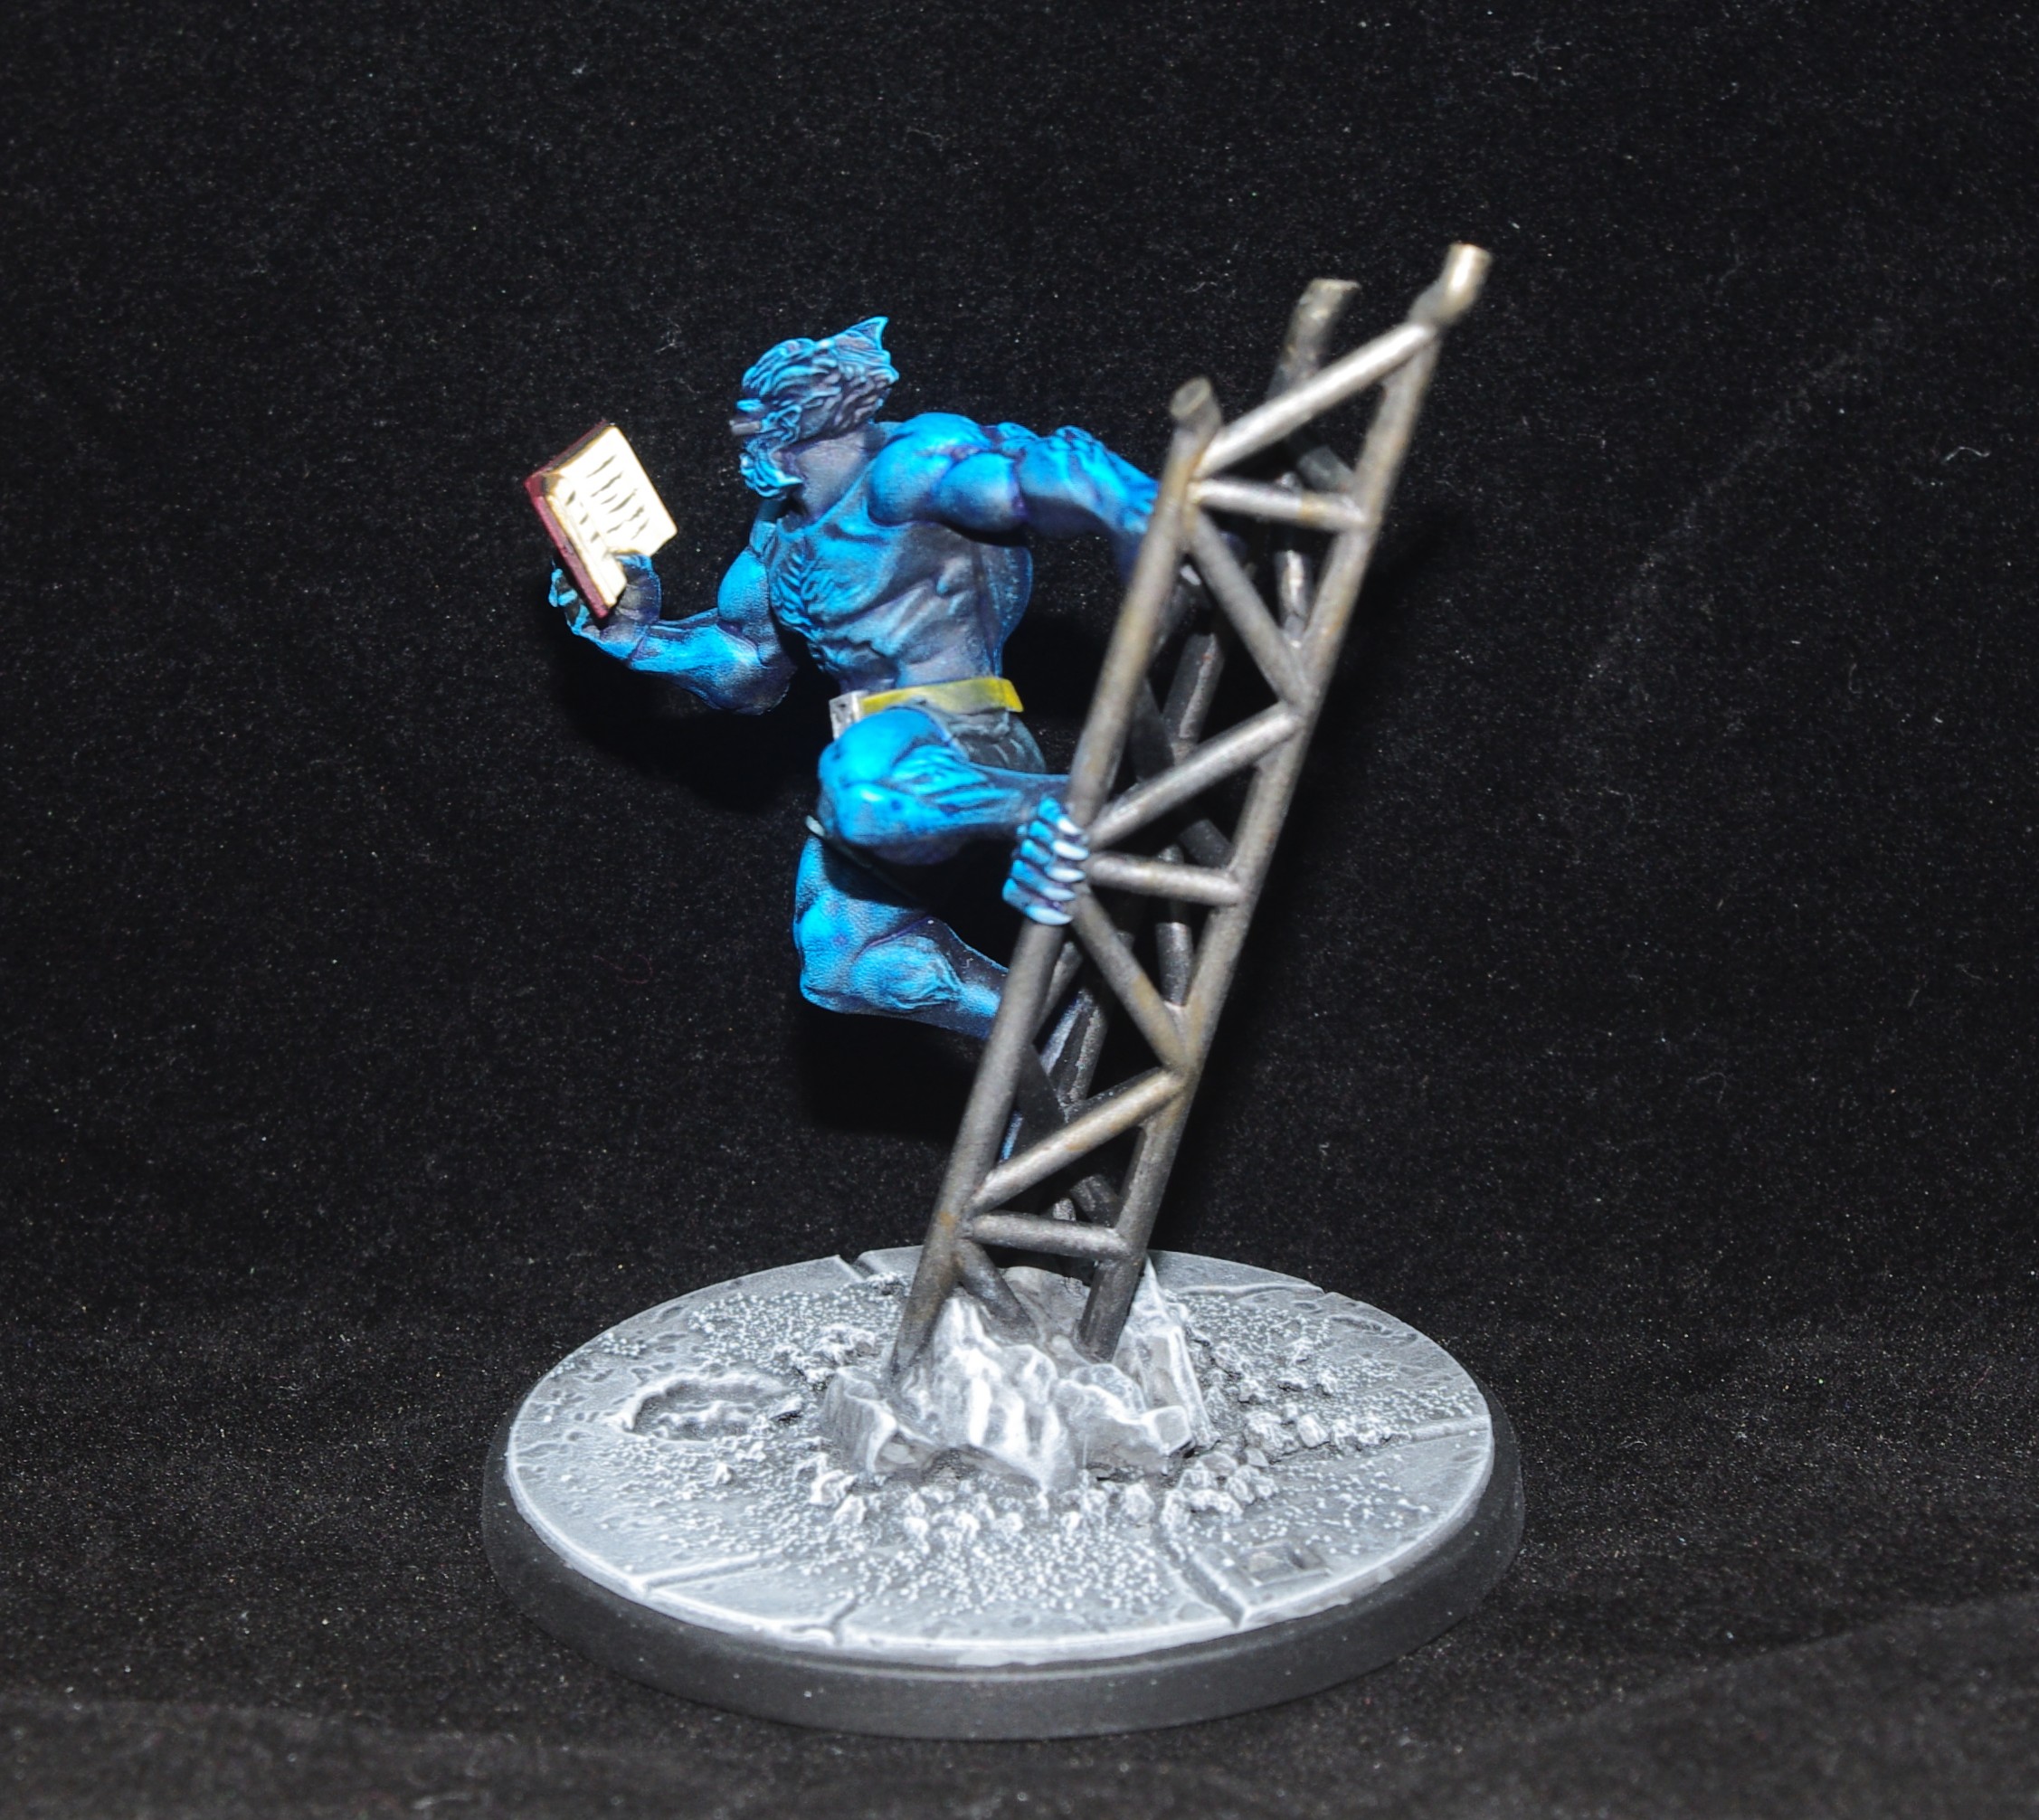
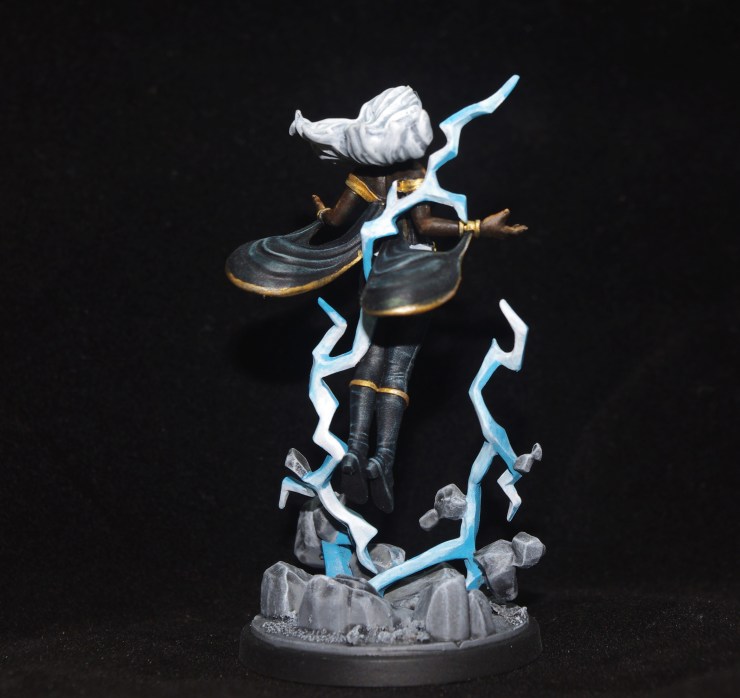
Yasmin bought the Uncanny X-Men affiliation pack at last year’s UK Games Expo and I’ve finally gotten around to painting them – I know, it’s nearly been a year, my bad! Cyclops and Wolverine I painted from a white prime and Storm and Beast I started from black.
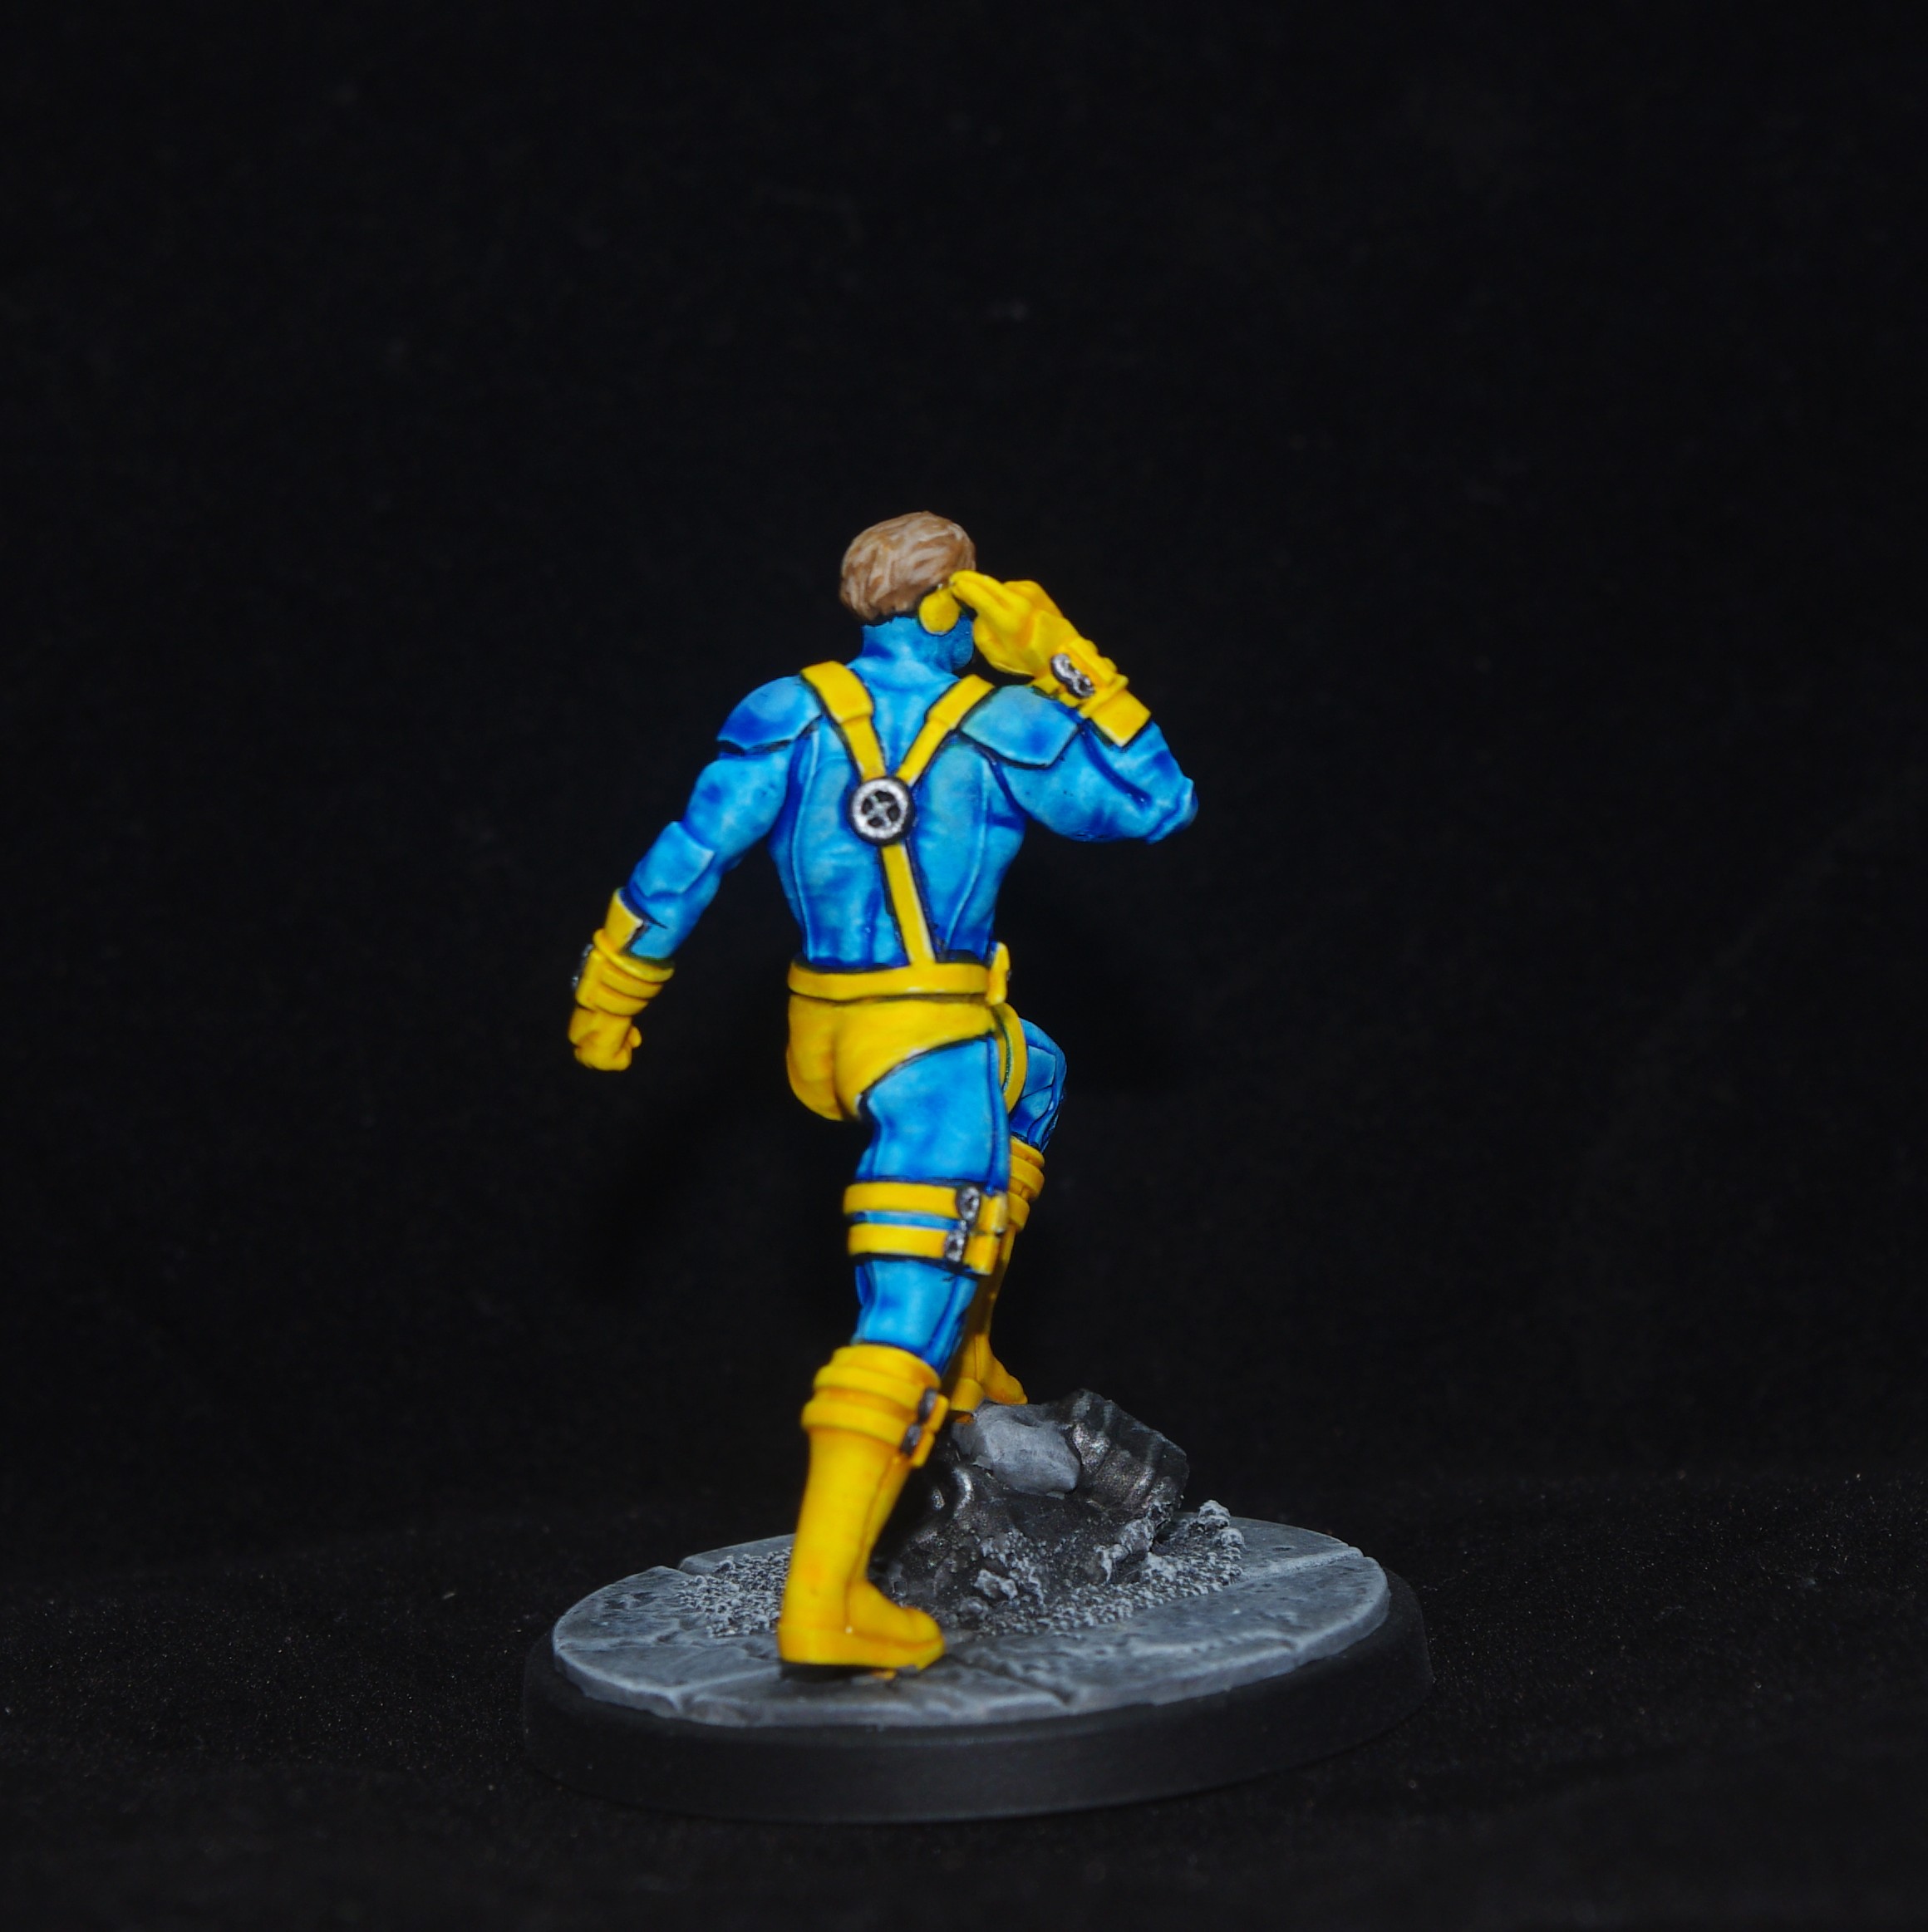
Cyclops and Wolverine shared the same colour base and were wrapped up pretty quickly. A single coat of Mystic Blue and Imperial Yellow Xpress paints took care of the majority, with the details painted in using more conventional methods – layering and glazing for the flesh.
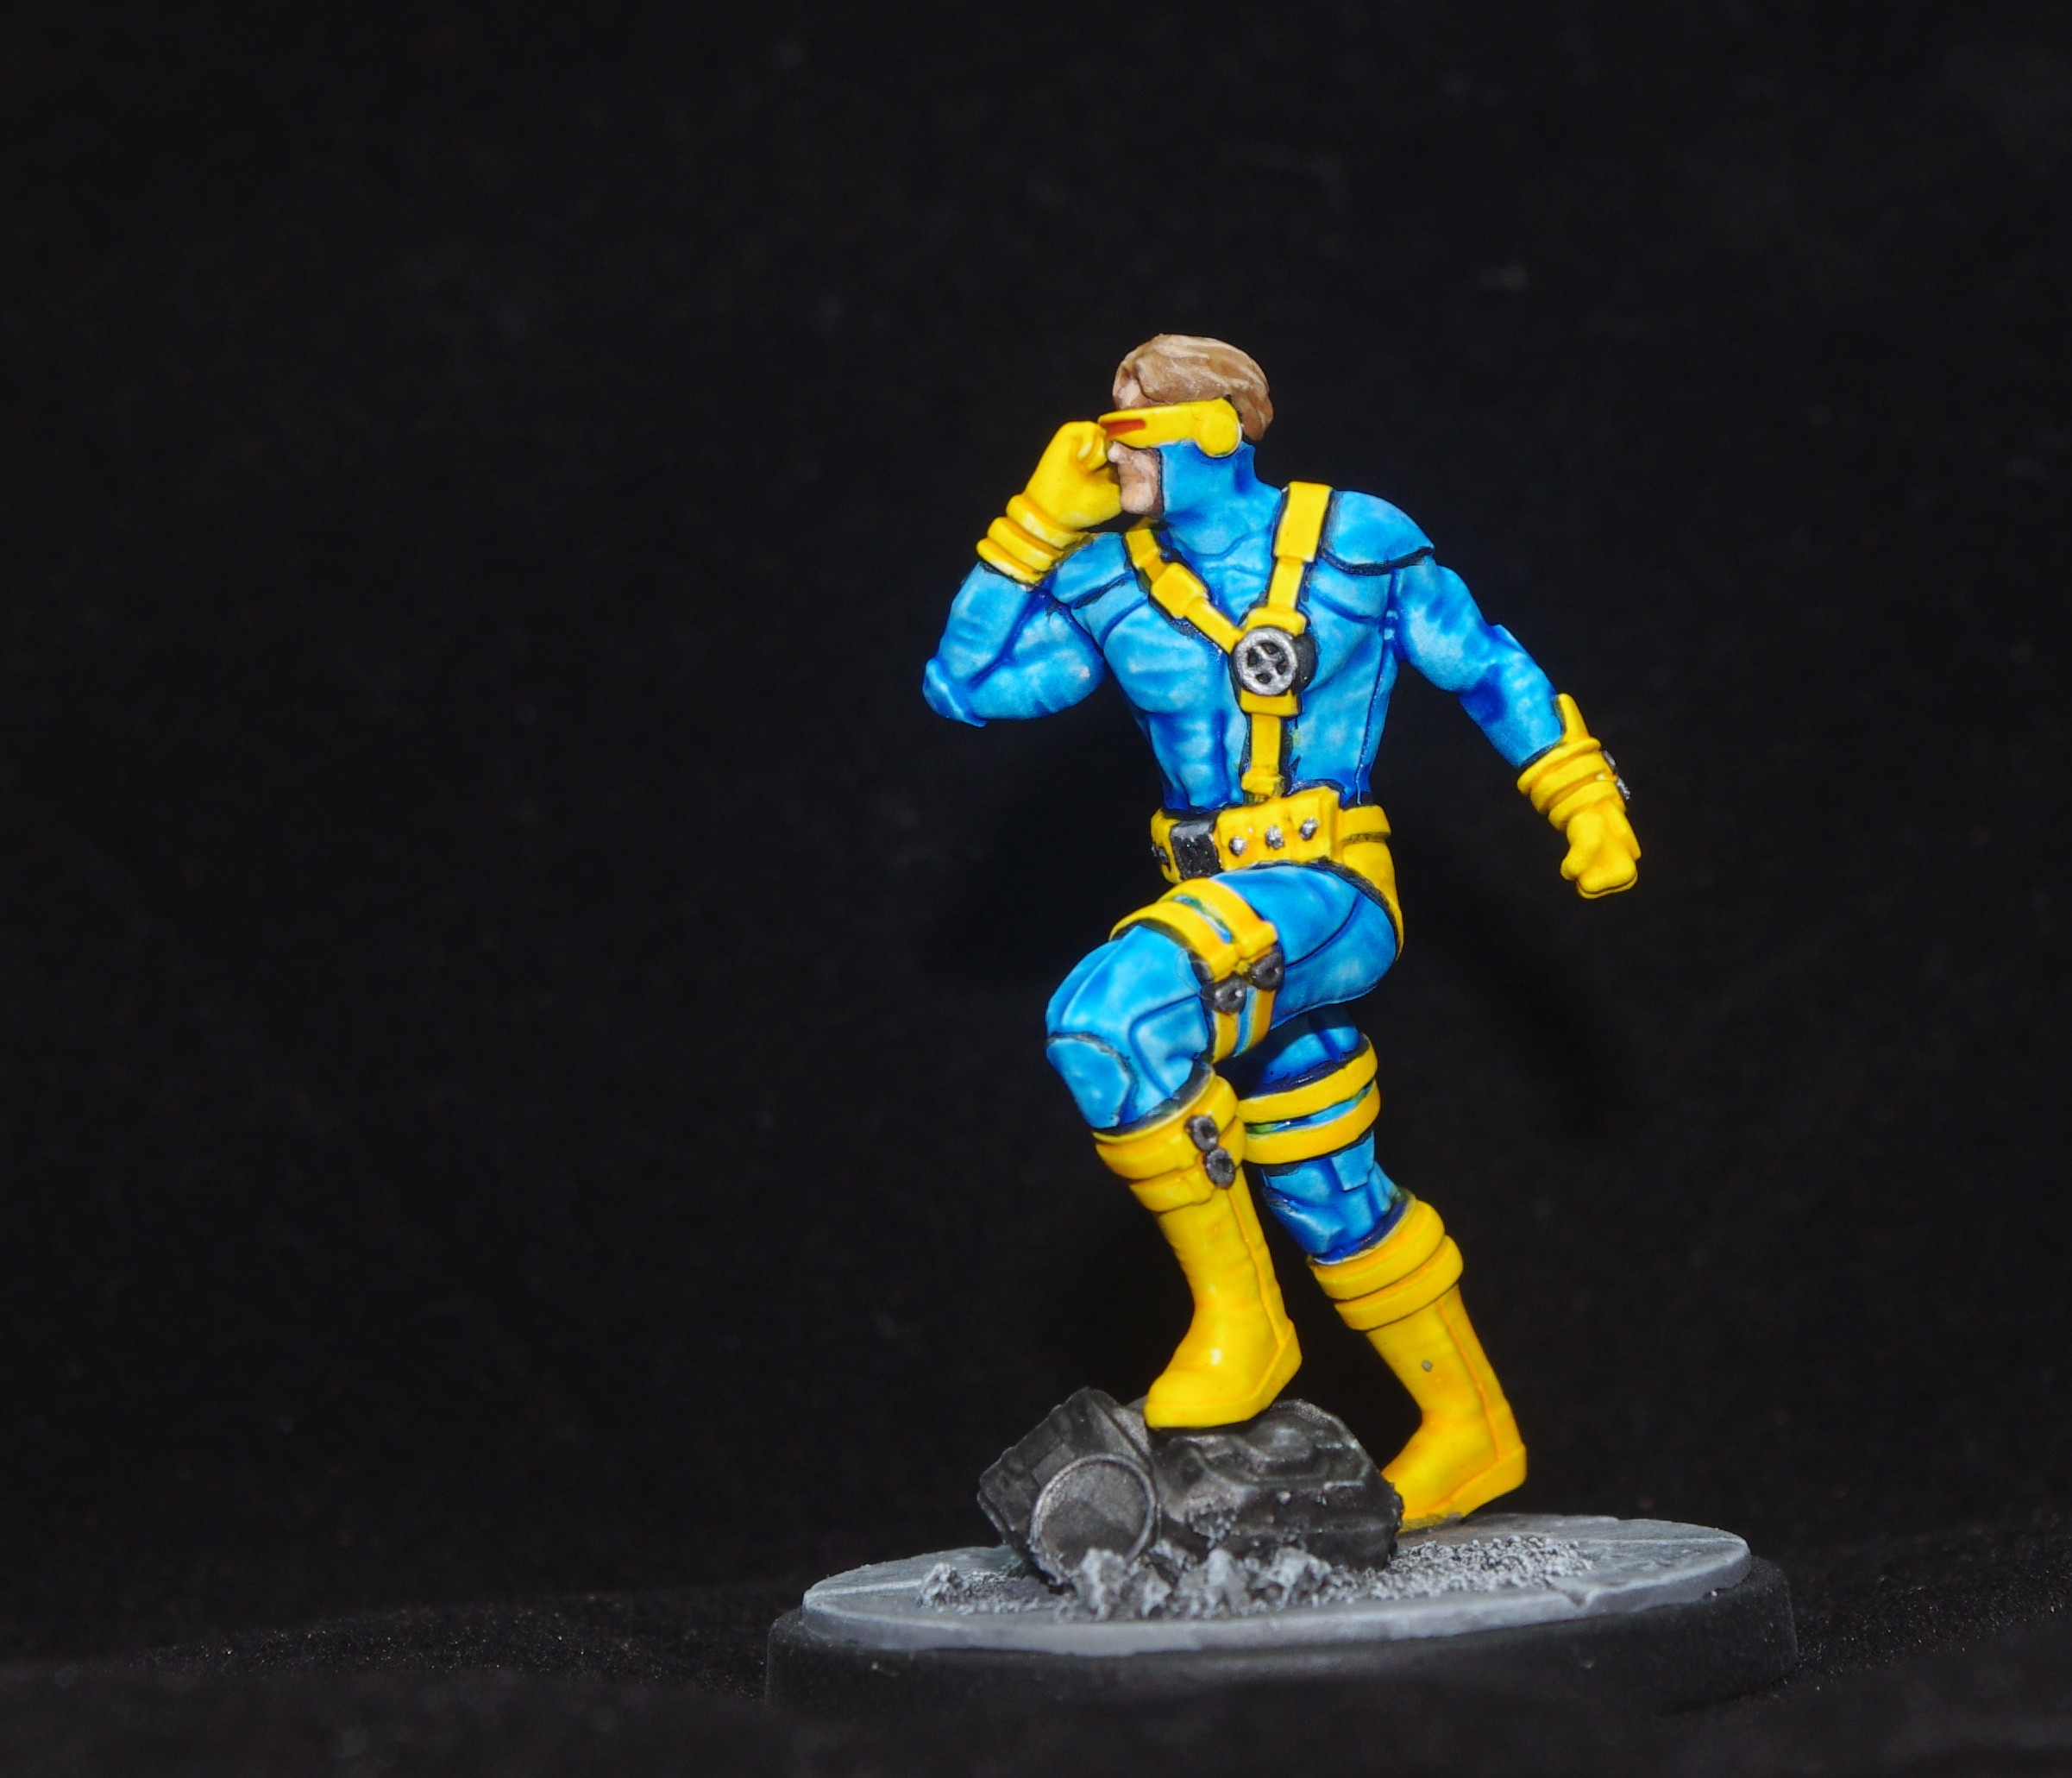
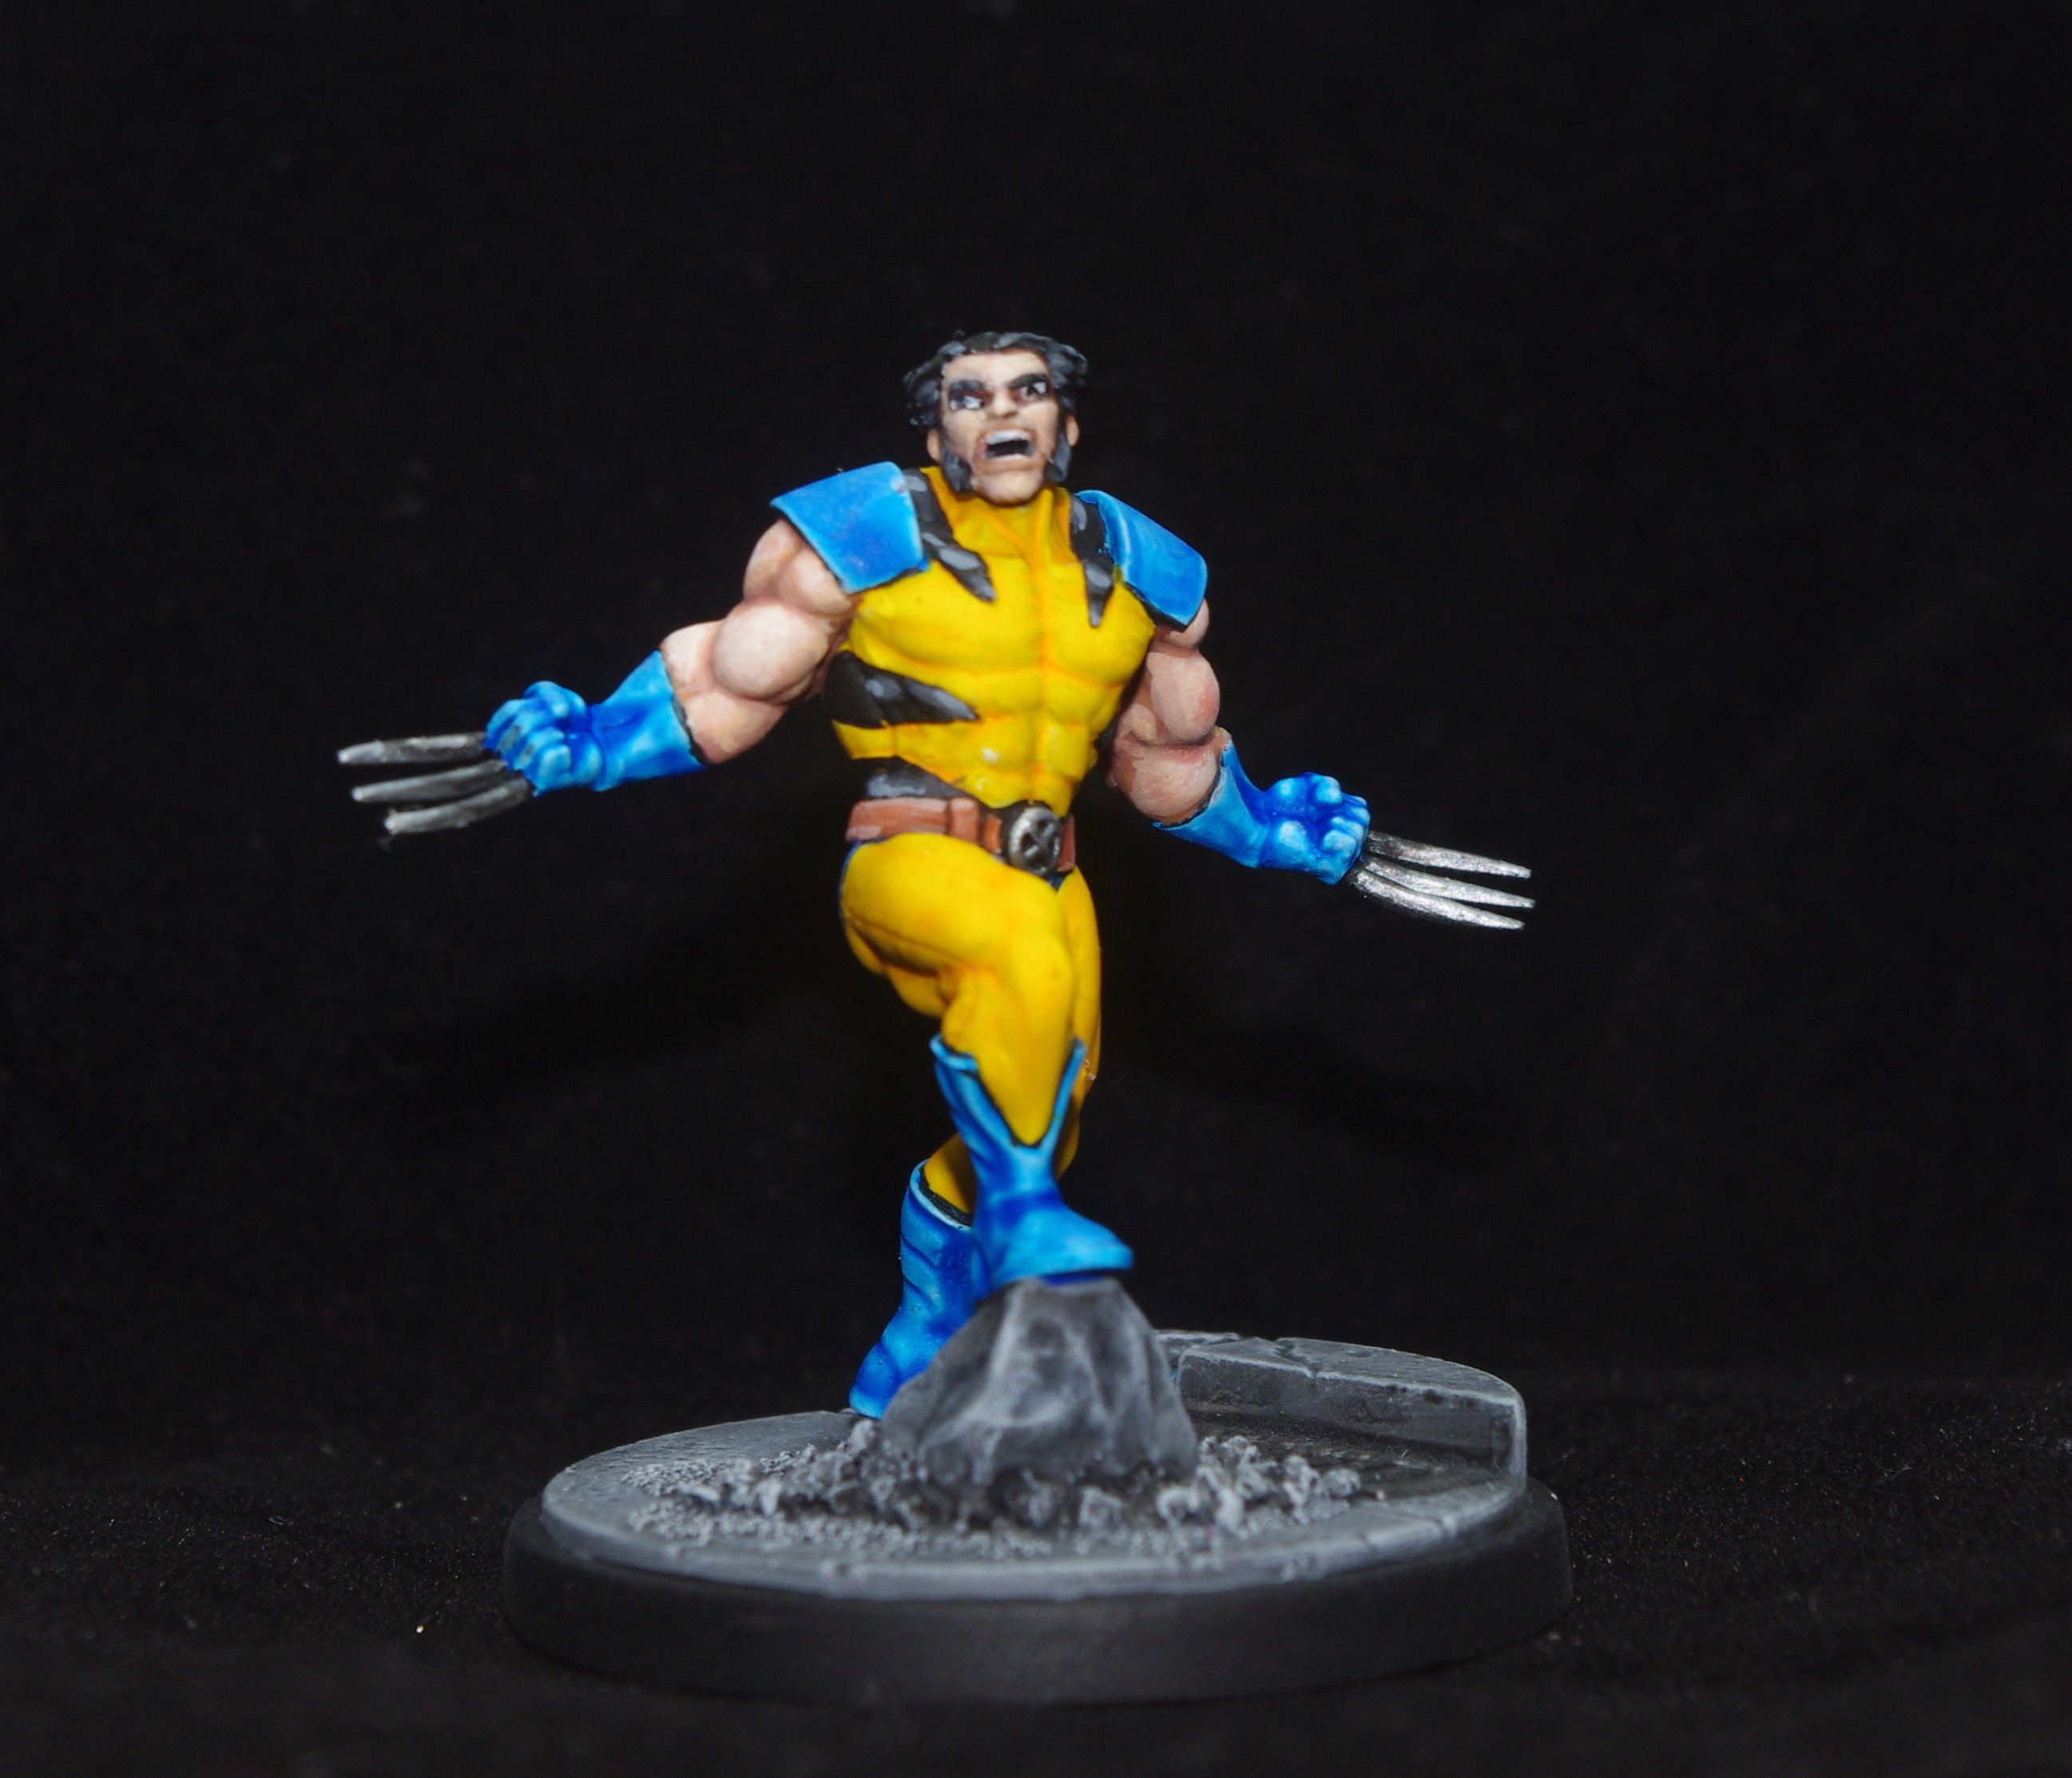
They turned out nice and bright due to the white prime and whilst there is some definite contrast there, it isn’t always where or how I’d like it to be. From game distance, they look good and for the time they took I couldn’t ask for more.
Cyclops took no time at all, as other than lining in, I had hardly any other areas to paint.
Wolverine took a bit longer, as I had a bit more flesh to work on. I could have used speed paints here too but I find I still have to do more work afterwards to get them looking satisfactory, especially when covering larger areas.

Moving on to Beast and, after priming black, I drybrushed the whole figure with Pale Grey Blue followed by white. I then used Mystic Blue for his flesh, Imperial Yellow for his belt, and Lotus Black for his shorts, all Vallejo Xpress. Painted in the other details, like the book and metal structure, finished the base and called him done.
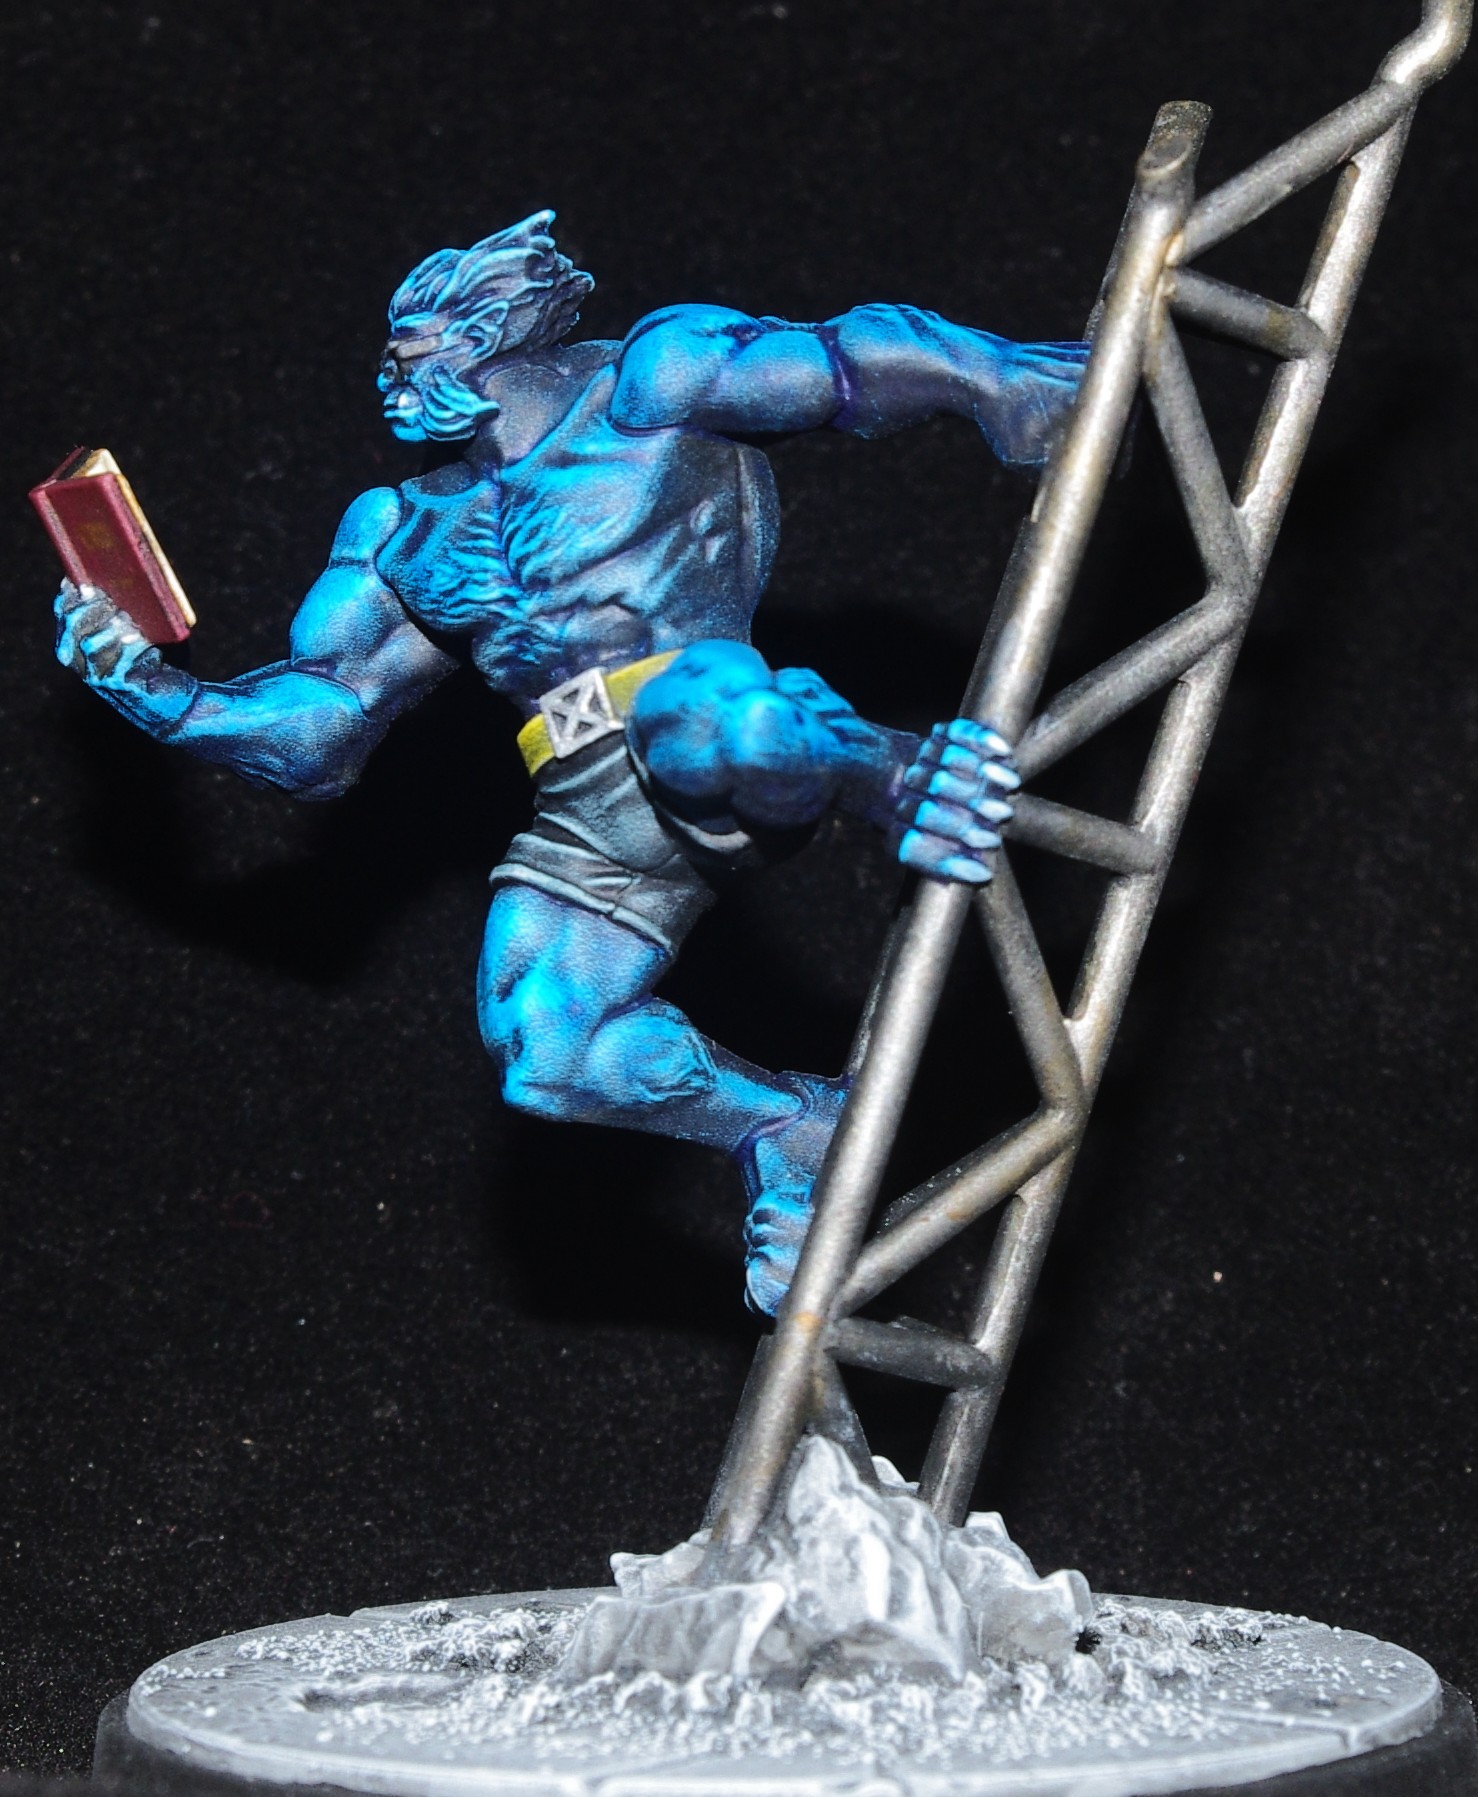
As you can see, he hasn’t got the vibrancy of the previous two but the contrast of the shadows is much better and controlled. The highlights, though, don’t stand out enough. In the right light he looks really good, better I think, than both the other two.

For drybrushing, I used the same colours on Storm as I did for Beast, as I painted them at the same time, and the results are pretty similar.
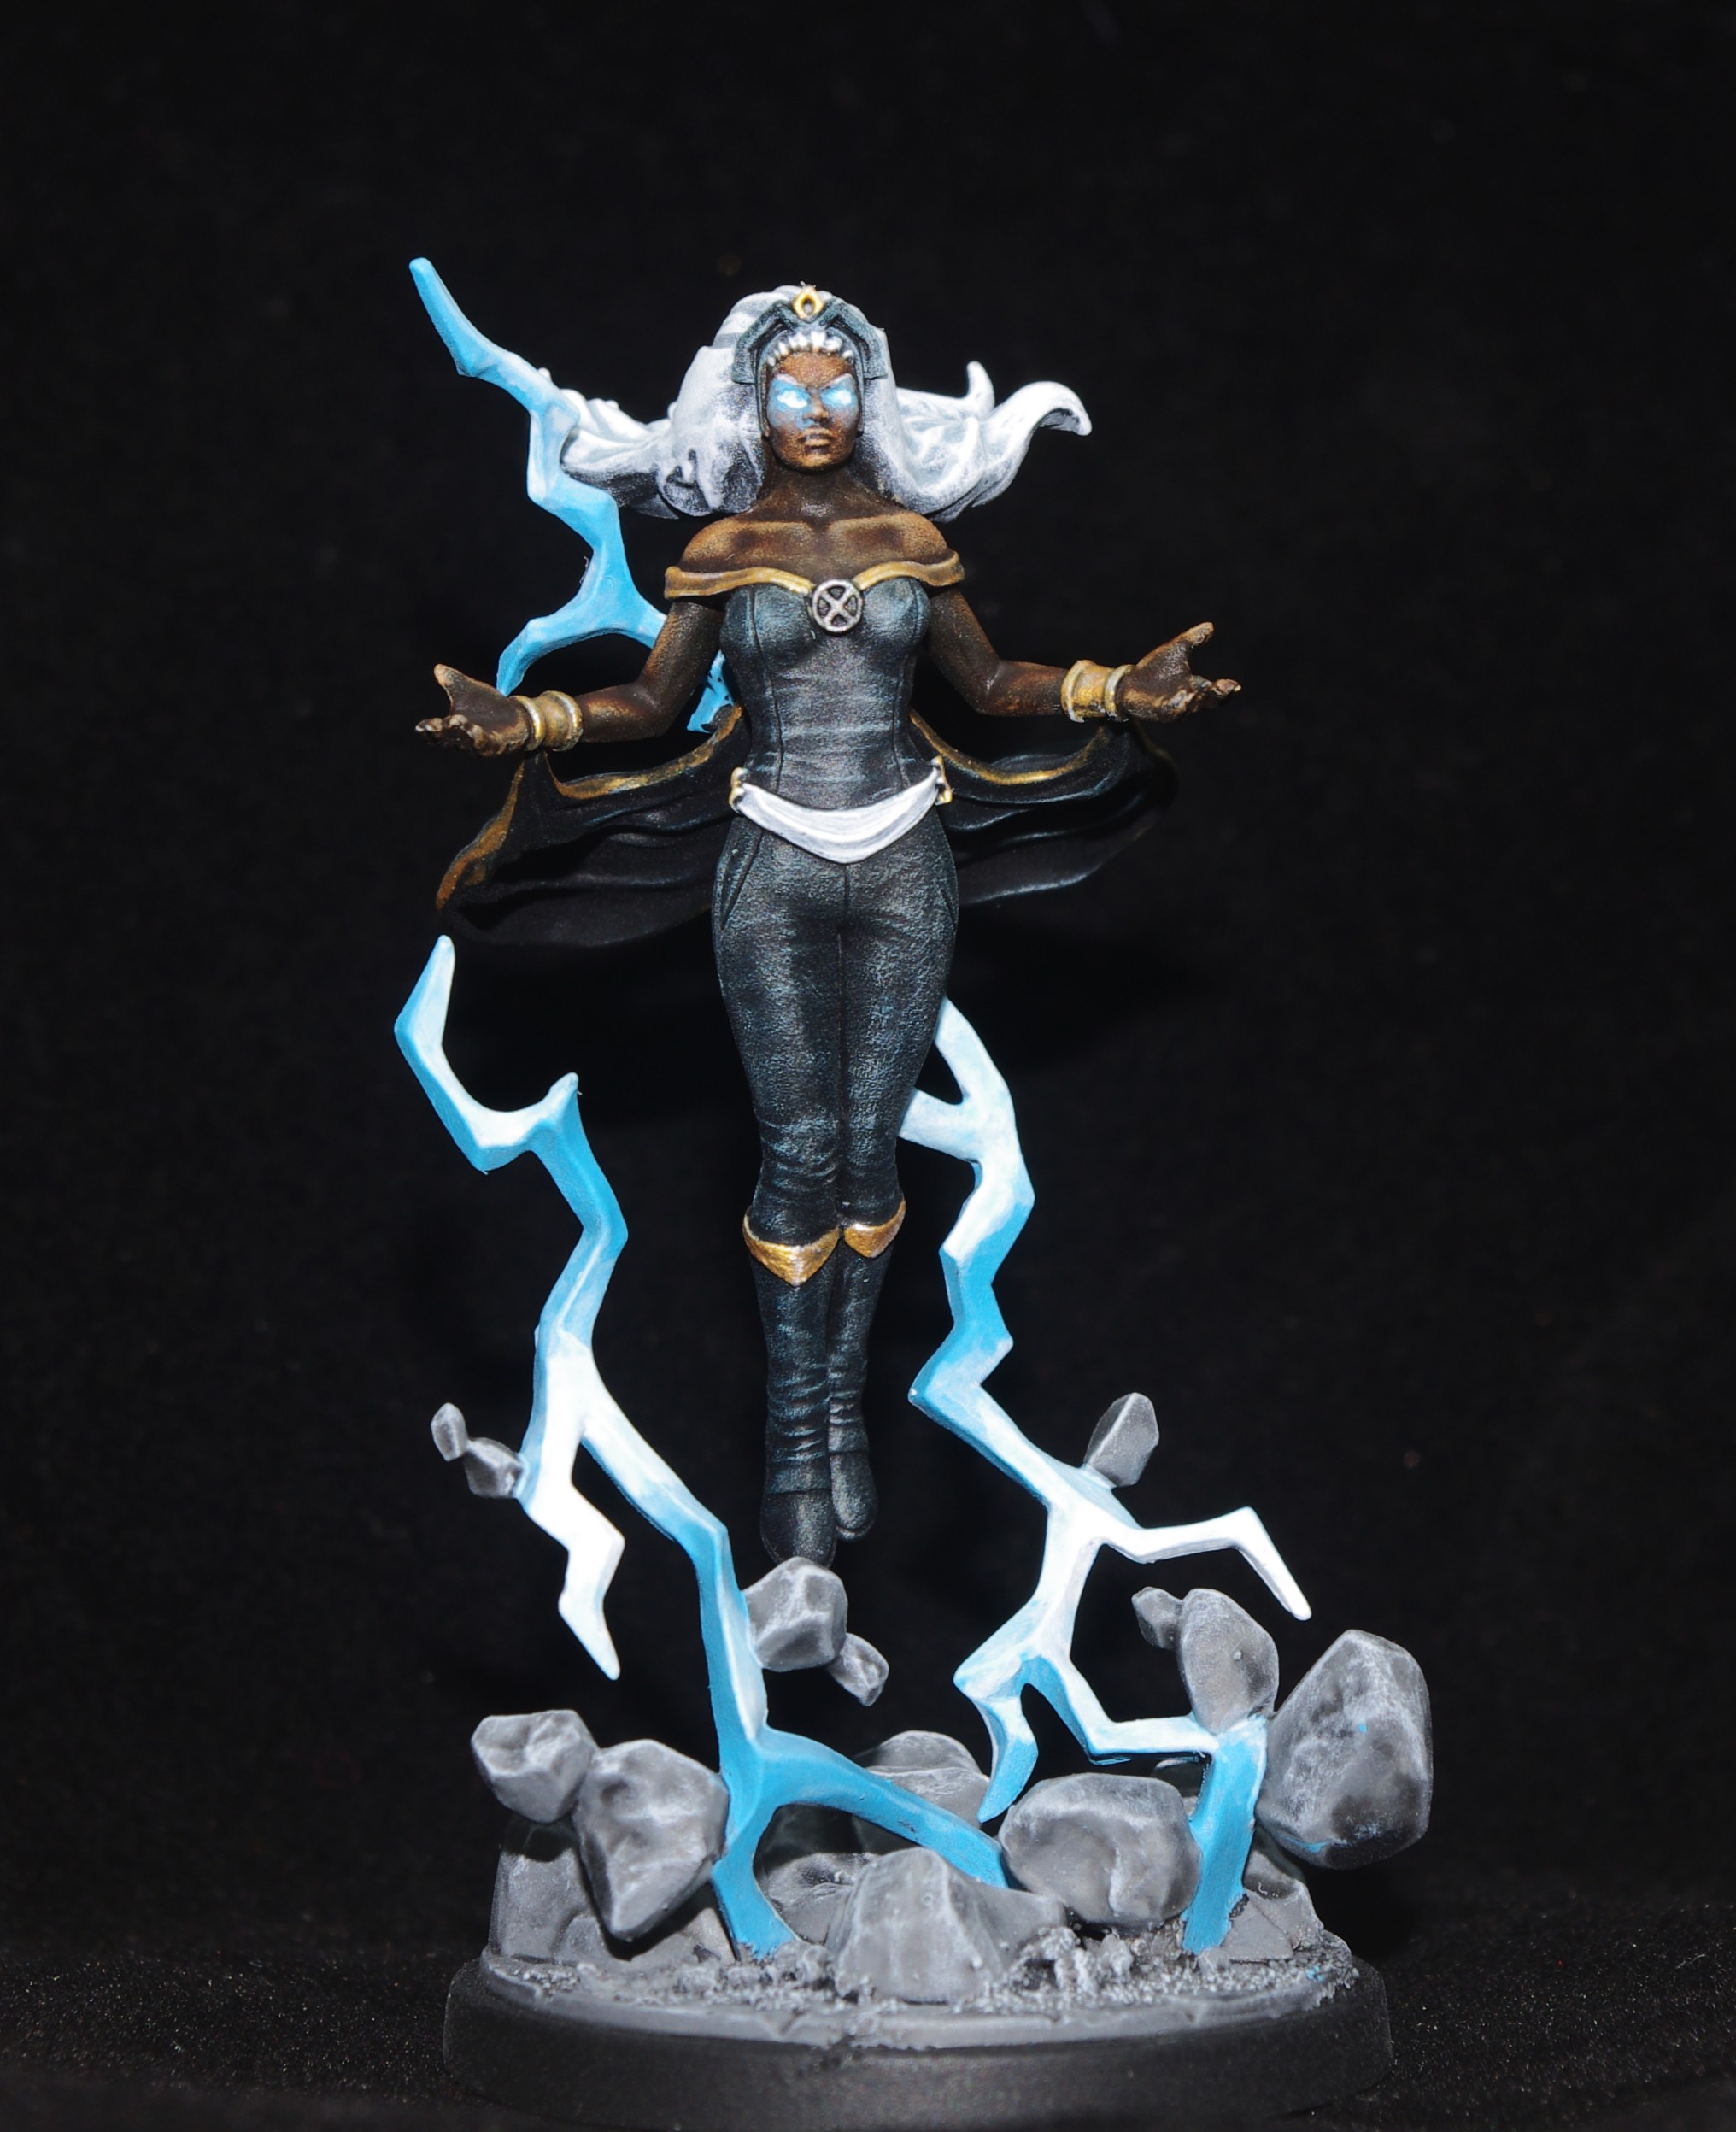
The Xpress paint over the grey and black has worked really well, providing a rich coloured mid-tone and some lovely deep shadow. However, the highlights leave something to be desired.
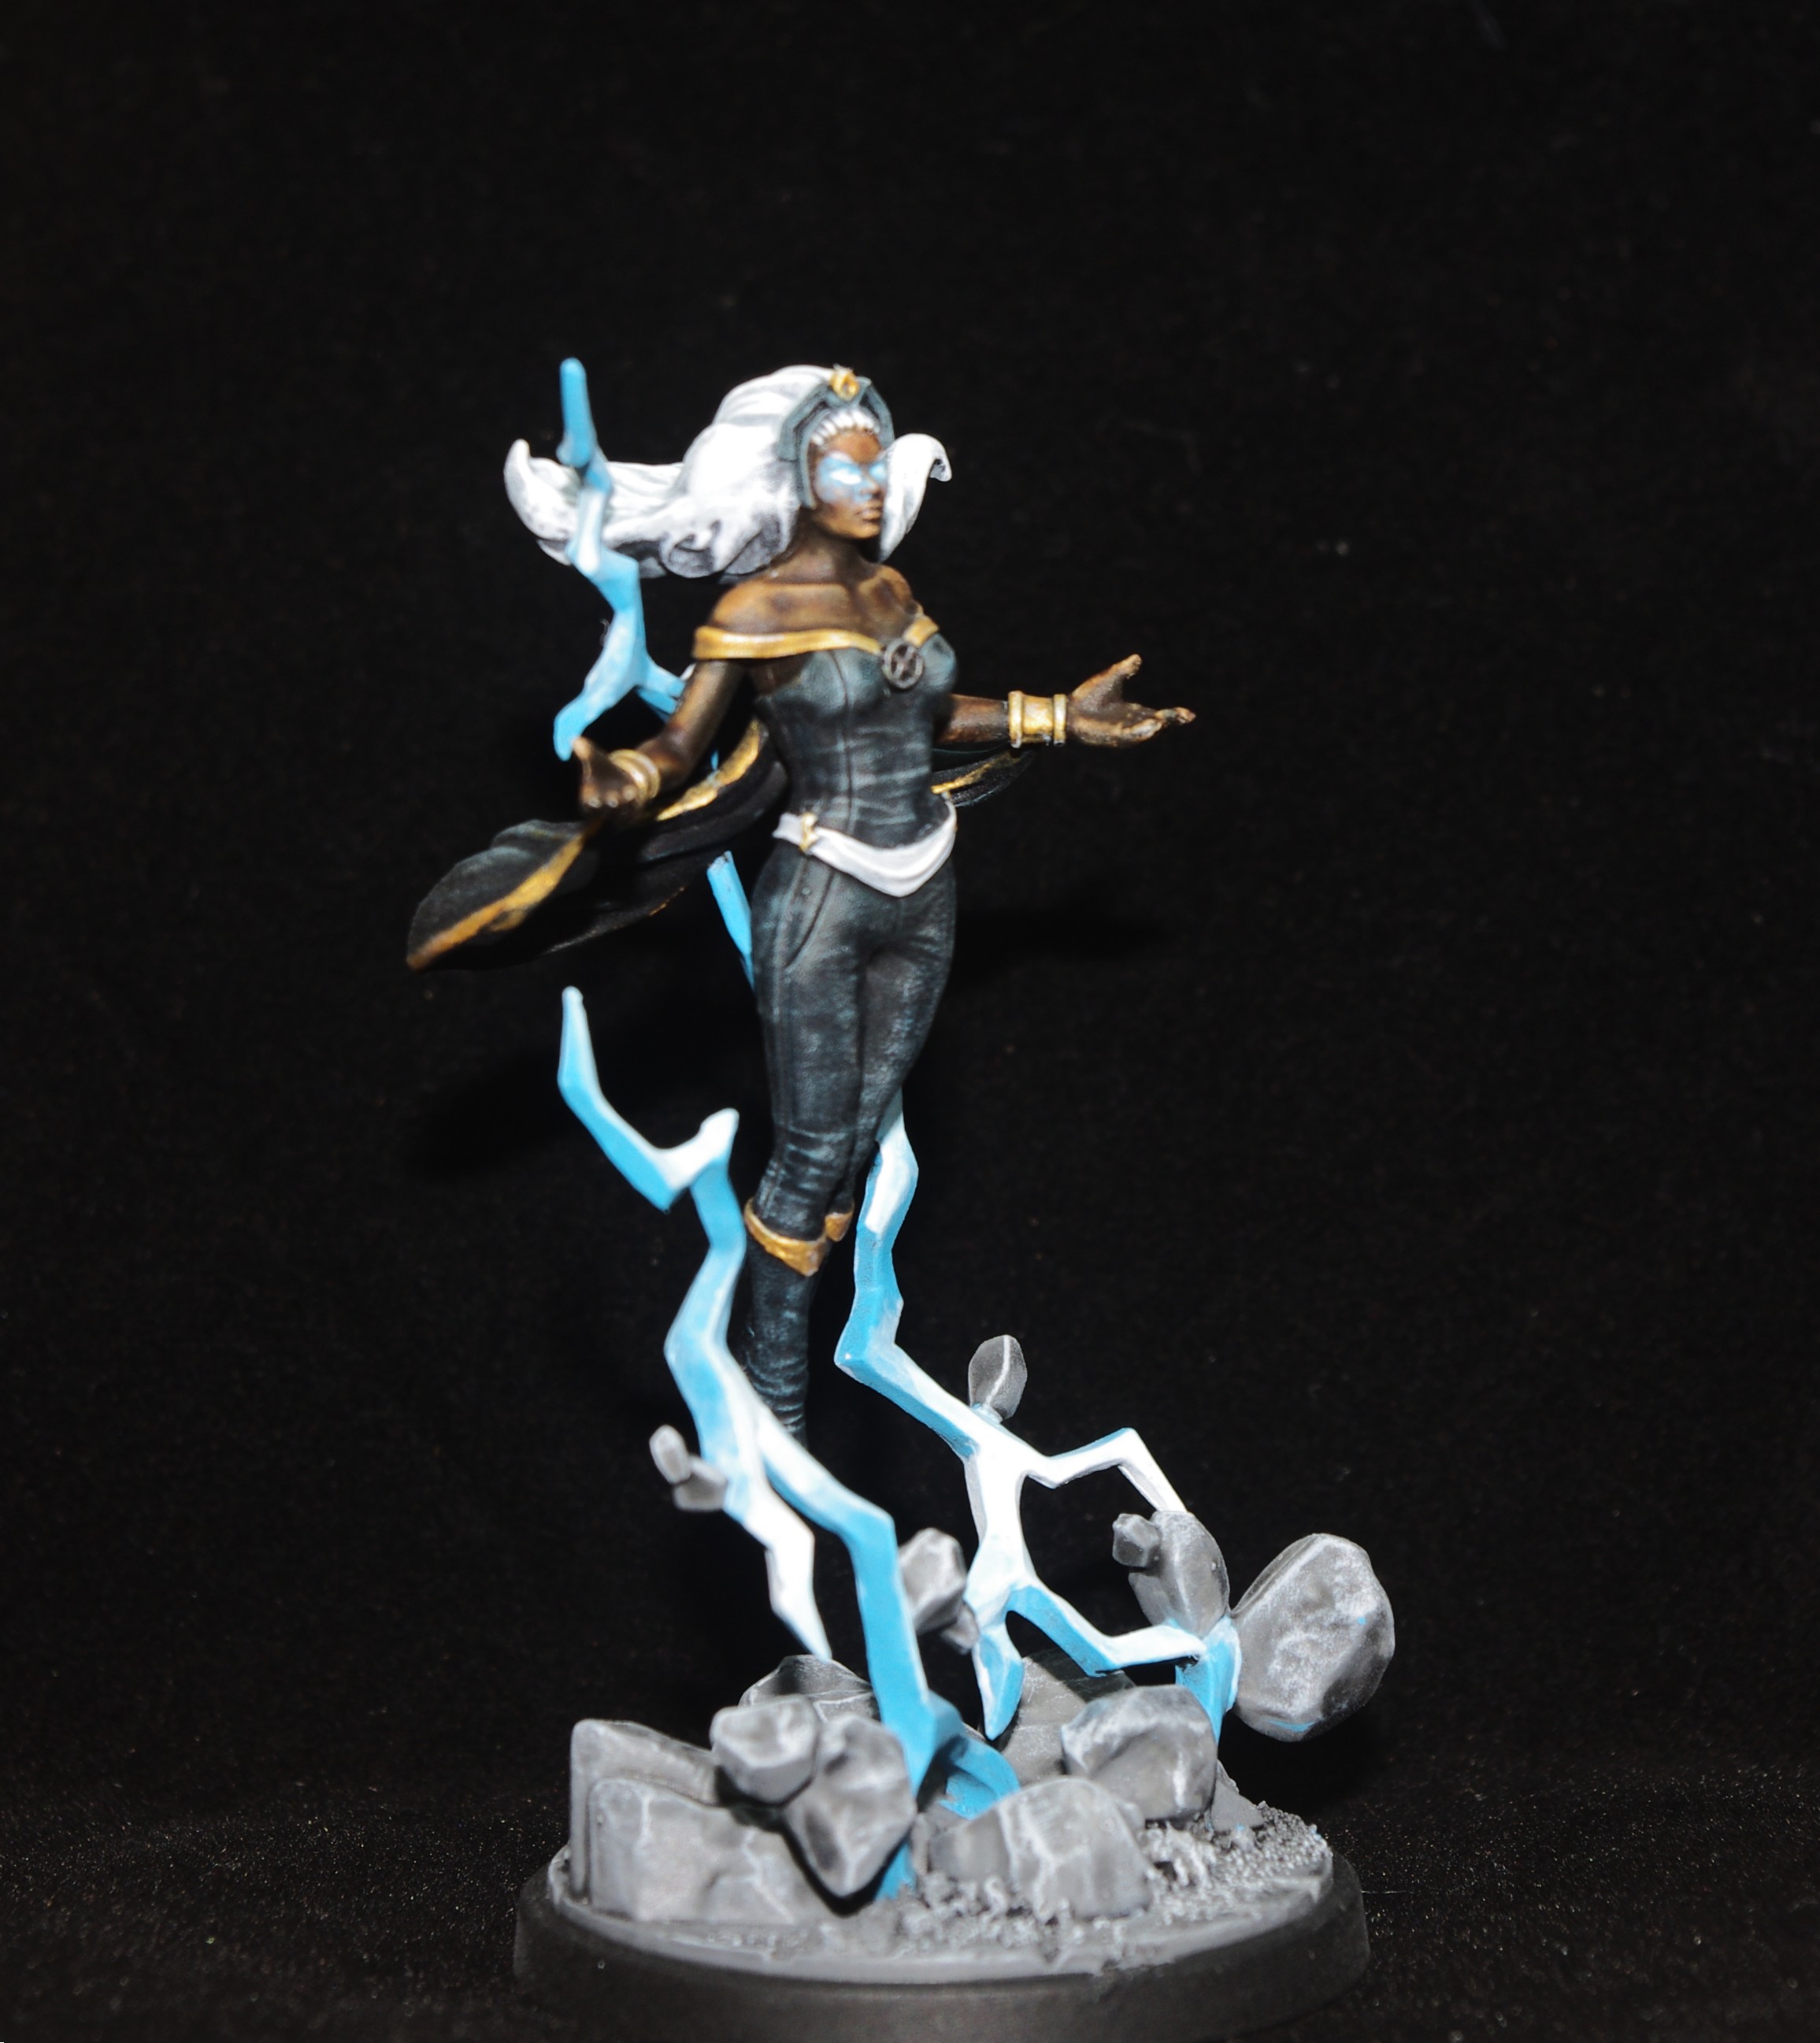
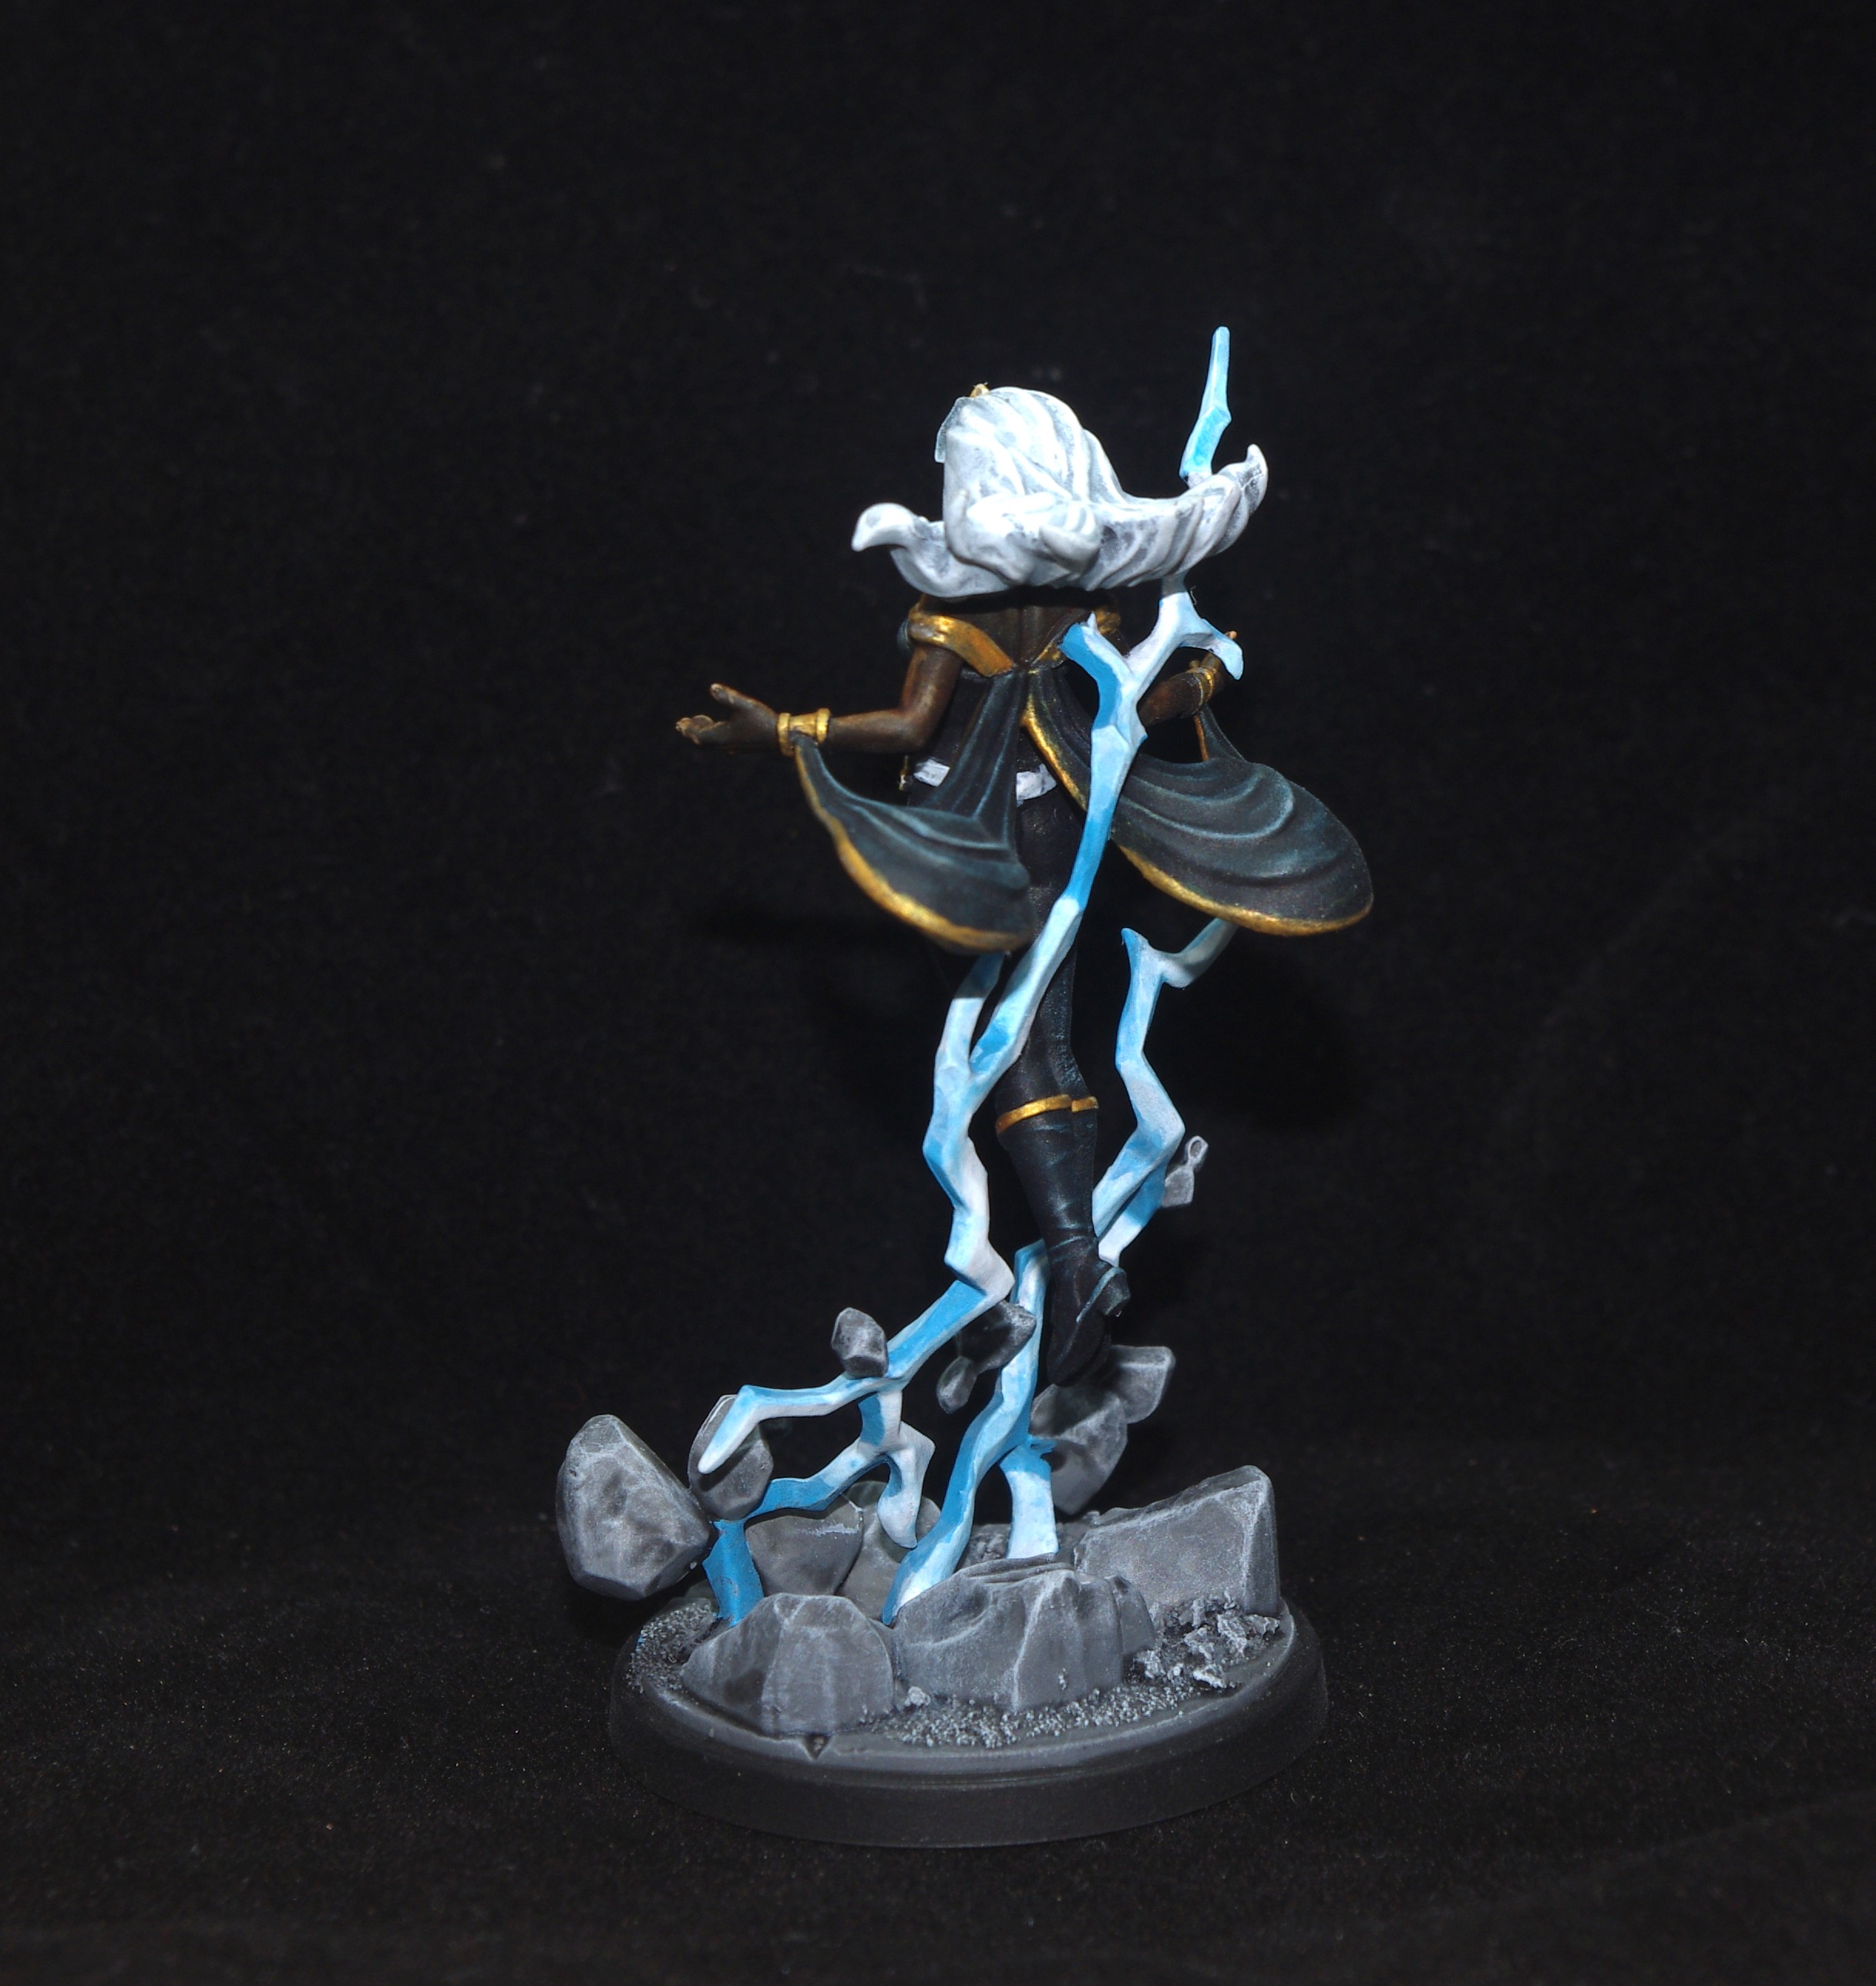
For her hair, I used Templar White Xpress but I then quickly highlighted it further in white whilst I was painting the ‘lightening’ effects.
I definitely prefer the overall look of the latter two, and next time I take that approach I will add in an extra step or two. After applying the Xpress paint I’d then go back and drybrush again. I’d experiment with both the grey and white and just white, then apply another coat of Xpress. Hopefully, this would enhance the highlights and increase the contrast.
Of course, I could add further highlights by painting them in but the idea here is to cut down the number of steps to speed up the whole process. Maintaining a ‘battle’ ready finish is the balancing act.
I’ve got two more Marvel figures currently primed – Iron Fist in white, and Valkyrie in Black. I’m undecided as yet as to whether to use Xpress on Iron Fist or not but I certainly will on parts of Valkyrie so I’ll experiment further on her – we shall see…

Excellent work Justin, especially for predominately express paints, putting in the extra work beforehand gives a better result in the end I think, agree the black primer ones look better, probably because of the drybrush adding to the contrast.
LikeLiked by 2 people
Thanks Dave.
I do think the extra work is worth is, especially as it doesn’t really add to the time take.
The idea is to get things done quickly but if there’s something that can be done to improve the finish, and it doesn’t extend the time taken, then it’s a no brainer.
LikeLiked by 1 person
Great work on these, me ol’ mucker! Glad to see you able to crank out some minis as I know your hobby time is limited. I’ve had good luck with some board game minis using a strategy similar to what you describe. Save time with “Contrast” paints and then reinvest it in the highlights which are what really make an impact on a miniature. If you can master this, then you’ll have a great looking set of minis in less time which is a win-win 🙂
LikeLiked by 3 people
Thanks Jeff.
I have had a play with the technique you mentioned and that works really well.
I guess I’m just experimenting to see the different ways you can use this type of paint – I like using them over a base colour, too, which can give some nice results.
They’re also good to make a glaze with.
Either way, they’ve certainly helped speed up my mini production, winner, winner!
LikeLiked by 1 person
Really glad to hear it, mate. Experimentation can teach you a lot of valuable lessons so keep at it! You’ll be achieving all your painting goals in no time too it sounds like 🙂
LikeLiked by 1 person
Nicely done, Justin! 🙂 I think Storm is my favourite of this bunch!
LikeLiked by 2 people
Thank you, John. Storm is my favourite too.
LikeLiked by 1 person
They’ve come out really nicely here – I agree with you that Storm and Beast look exceptionally good and Storm’s lightning really looks great here!
LikeLiked by 1 person
Thanks, Azazel, those two definately look better than Cyclops and Wolverine, though I’m pleased with them all.
I like the ‘grittier’ look of Storm and Beast as opposed to the ‘light and airy Cyclops’ and Wolverine, if that makes sense!
LikeLike
Nice painting, the slapchop approach is good for getting minis ready for the tabletop. There is always that balance between being a fabulous work of art vs being painted quickly enough to actually play the game!
LikeLiked by 1 person
You get to Play Games?
Seriously jealous!
Lol! Thanks mate. It certainly is a help in getting through the backlog.
LikeLike
Haha, if I never played games I’d never have hte motivation to paint at all! But yes, I get a couple of games a week usually of one thing or another. The social gaming is my favourite bit of the hobby.
LikeLiked by 1 person
Nice!
I’ve gone from playing almost daily to being lucky if I get something to the table once a month.
I find painting a great way to unwind, especially with some great music on in the background, but yes, it really is a means to an end – I paint to play, but spend more time painting than playing!
LikeLike
Clearly you need to find a way to join a local games club or something to get out there and enjoy a bit of social gaming.
LikeLiked by 1 person