
I’ve finally completed painting the Star Wars: Legion core set Stormtroopers, so it’s time to take a closer look.

Overview
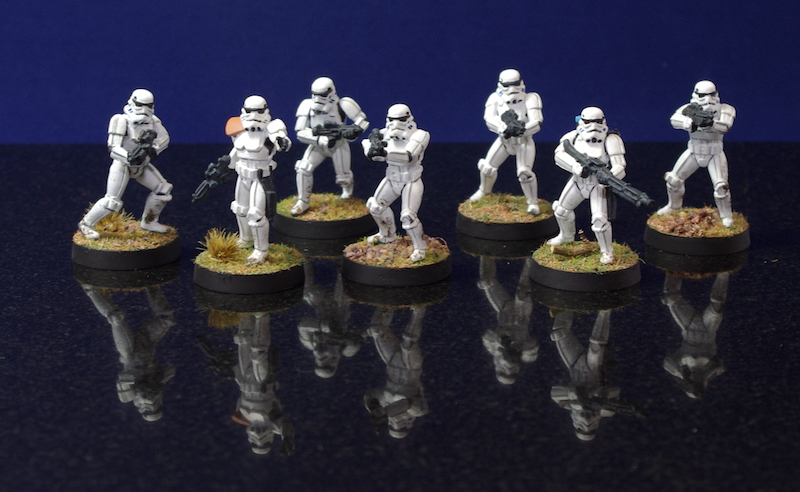
The core set comes with 14 Stormtrooper miniatures, and within these there are 7 different poses.
Leaders.

Basic Stormtroopers.
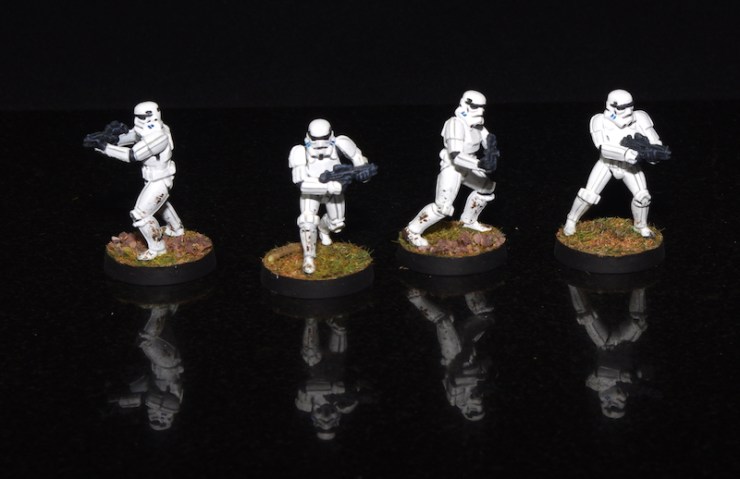
DLT-19 Stormtroopers.

HH-12 Stormtroopers.

A standard unit of Stormtroopers contains 4 models and costs 44 points, but this can be increased by adding one standard Stormtrooper and one heavy weapon Stormtrooper, ranging from an extra 11 points for a Trooper to 34 points for the HH-12.

A gear and a grenade upgrade can also be added, and the core set comes with targeting scopes and concussion grenades, of which only the grenades are of benefit to the Stormtroopers – the scopes infer the ‘Precise 1’ benefit to the unit, which the Stormtroopers already have.
Adding the grenades enables the Stormtroopers to step up their attack from a single white die to a black one when attacking at range 1 – this is definitely a worthwhile option, as the Stormtroopers only use a single white die on attacks at ranges 1-3, as opposed to the Rebel Troopers single black. They do, however, have an attack surge conversion, which, alongside their ‘Precise 1’ (reroll up to one additional die when you spend an aim token), makes them a more aggressive unit than the rebels, and probably justifies the extra 4-point cost of a unit.
Deciding which heavy weapon model to add to the unit will probably come down to how you want to use your units strategically, and the make up of your opponents forces.

The HH-12 is an excellent choice if you are up against heavily armoured units, as it has a long, 2-4 range, uses 3 black dice, and has ‘Impact 3’ (Attacking armour change unto three standard hits to critical hits). But, it is ‘Cumbersome’, meaning you can’t use the weapon and move in the same activation, and it does need to be readied again after use by preforming a recover action. All this is going to slow you down, and it does cost 34-points. Just playing with the core box and it may not be worth including, as there is only a single AT-RT that has armour.
The DLT-19 on the other-hand, is a much more flexible addition – it has a long range, 1-4, uses two red dice, and has ‘Impact 1’, but comes with none of the negatives associated with the HH-12; it also costs 10 points less!

Painting
Firstly, credit where credit is due – I painted the Stormtroopers with reference to Sorastro’s painting guides, which have increased my knowledge and abilities massively, thank you very much, though I still feel I haven’t done the figures justice!
White! How I hate painting white – I always find large areas of white one of the hardest colours to paint, and as Stormtroopers are pretty much all white, I didn’t get the most enjoyment from painting this bunch!
I started off painting a batch of Stormtroopers – 7 models, 1 of each pose – by hand, priming them grey and then layering white over the top. But then I decided to get myself an airbrush, and putting it good use, I quickly primed the other 7 figures grey, followed by a spray of white from above. You can certainly tell which are done by hand and which were done by airbrush; it’s a much cleaner look.
I’d made the mistake of assembling the figures beforehand, and so the arms got in the way when it came to painting the torsos, but it wasn’t as much a problem as it was when I came to paint the Rebels!
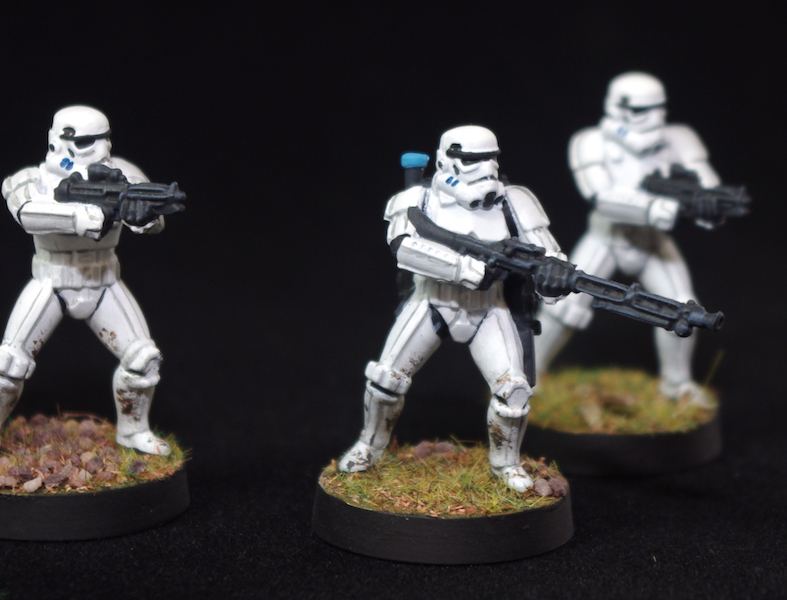
The black detailing, actually a mix of black and German grey, was added next, followed by the weapons and the DLT-19’s backpacks. Other detailing was then added, including the leaders pauldron, which I layered slightly lighter towards the top, feathering in each layer by using a damp brush.
After this I had to touch up the white basecoat, as my hand hadn’t been at its steadiest – I later discovered that holding the brush much closer to the bristles makes a massive difference when it comes to accuracy, something I’ll approach in a later post.

A few more little details were added; deviating from Sorastro’s video, I dry-brushed the weapons with Vallejo’s sombre grey, also using it to edge highlight the backpacks and holsters. I then lined in the armour creases using Vallejo’s heavy bluegrey – Sorastro uses mechanicus standard grey by Citadel. (The supposed equivalent to Citadels mechanicus standard grey is Vallejo’s heavy grey, but this has a far more greenish tinge to it than mechanicus, whereas I find the bluegrey a closer match.)
Once again, I had to touch up the white!
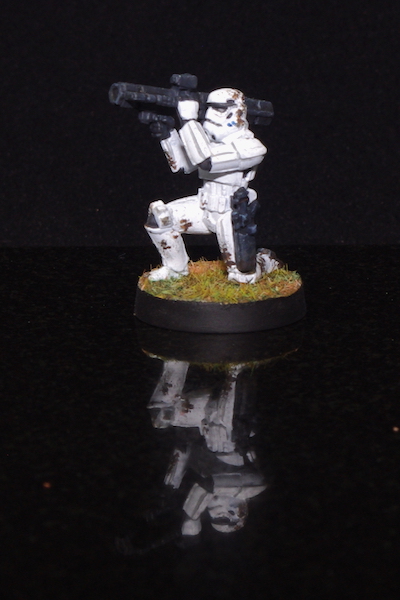
I then had a go at weathering, pretty much my first attempt at doing this. Following Sorastro’s method, I applied a little paint to a ripped sponge and dabbed over the figures here and there. He used two different colours – a medium grey followed by a mix of earth and dark grey.
I concentrated mostly around the boots and lower legs, though I did give one or two troopers a more liberal helping, especially the kneeling HH-12 figures.
At that point I was reasonably happy with the results, but I came back to them after I’d brought myself some of Citadel’s typhus corrosion, which I used for weathering on the rebels.
Typhus corrosion is part of Citadel’s technical range, and contains small particles giving a slightly textured finish, which, as I found out, bears a remarkable resemblance to dried mud (though it is usually used when creating rusting effects)
So, I had another dab over with this, and though I like the results it gave, I may have gone a little too far with it!
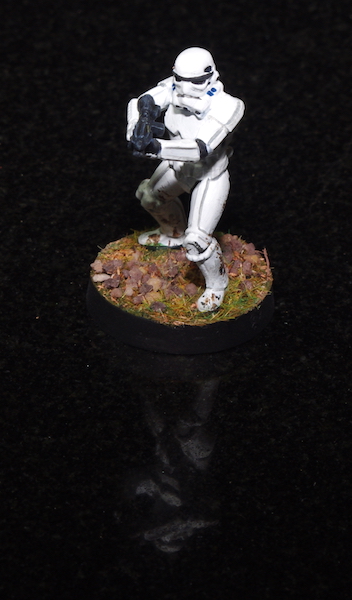
I had made my mind up, eventually, to base my battles in a forest setting, similar to Endor or the forests of Takodana. Fortunately, so had Sorastro, and I roughly followed his method for basing.
I coated the bases using Vallejo’s brown earth texture, a much quicker method than applying a sand base, and washed it with an equal mix of green and umber wash.
I then applied a coat of thinned down PVA, and scattered several different types of basing material over it, starting with a light brown forest scatter, followed by three types of grass, darkest first.
I varied the bases by adding some ‘brown stones’, and some ‘logs’ that were actually cut-up dried stems from a miniature rose bush; I even added the odd tuft of grass to one or two of them.
Finally, they needed varnish. The only varnishes I possessed at the time were Vallejo’s Matt and satin acrylic varnishes, which after a little research I wasn’t happy with spraying using the airbrush – there is no information, either on the bottle or on their Website, on whether it can be applied in this manner, and according to the forums, it is prone to ghosting or misting.
After more research I purchased a matt varnish from Vallejo’s Mecha range, which is designed specifically for use in an airbrush. (The Mecha range is aimed at painting robots and other mechanicals.)
I thinned it slightly using airbrush thinners, and sprayed three very fine coats over the miniatures – wow, this stuff is awesome!
The finish is very flat matt, unlike the brush on varnishes I’d previously used, which no matter what I seemed to do gave a very slight shine to the finish. I then applied a coat of satin varnish to specific parts of their armour using a brush, with the hope of giving it a subtle shine. I’m not sure I did enough here, maybe another coat, or possibly a gloss would give a better look, but for now I think I’m happy with the results.
In the end…
Not the most enjoyable miniatures I’ve ever painted, but I have learnt a lot by doing them – I’ve certainly improved my brush skills, and I think it shows on the Rebel miniatures I painted next. Using an airbrush has certainly boosted my output – the time spent on priming, basecoating, and varnishing, has been cut ten-fold.
I must get another unit of Stormtroopers at some point, as an army must contain 3 to 6 corps units – only 2 come in the core set – and I’m pretty sure I can improve on what I’ve done here, after-all, practice makes perfect!
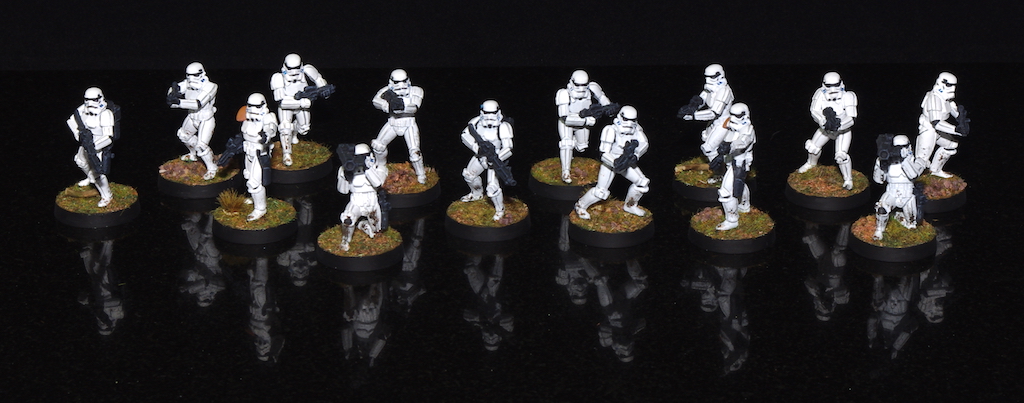
In Pictures…


Very cool painting on the classic design – they look great!
LikeLiked by 1 person
Thanks, can’t wait to get them to the table – just got to finish the rest of the core set first!
LikeLiked by 1 person