
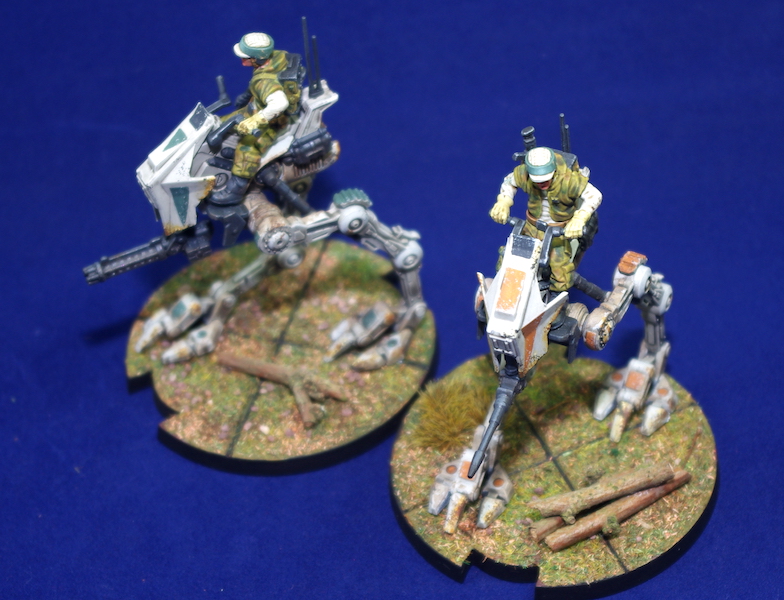
The core set of Star Wars: Legion contains one AT-RT unit, consisting of a single miniature, however, I purchased an additional one as an expansion (It was going cheap during last year’s Black Friday Event!) – Let’s take a look.

Overview
The AT-RT provides the Rebels with a powerful, and relatively cheap, close support weapons platform. It is reasonably manoeuvrable with a speed of 2, and its climbing ability means it can keep with the troopers over all sorts of terrain, providing cover fire wherever, and whenever they need it.

It’s armoured, which is always a plus, and it has a good wound threshold of 6. It also has a resilience value of 4 – when the miniature suffers wounds equal to its resilience value it becomes damaged or disabled in some form. It does only roll white dice in defence though, so expect to take regular, if not large amounts of, wounds.
It’s in attack where its real strength lies, and not just at range either. Get this bad boy into melee combat and it attacks with those nasty looking grappling claws, using three red dice along with Impact 1 when attacking armoured units.
You’re obviously going to fit this out with a hard point weapons, and there’s a choice of three – Rotary Blaster, Laser Canon, and Flamethrower.

The Flamethrower can be a devastating weapon when used against trooper units, but it isn’t for the fainthearted. With a range of only 1, you have to get right up close and personal, and ideally against units with lots of minis, which means you’re likely to receive a fair amount of return fire yourself.
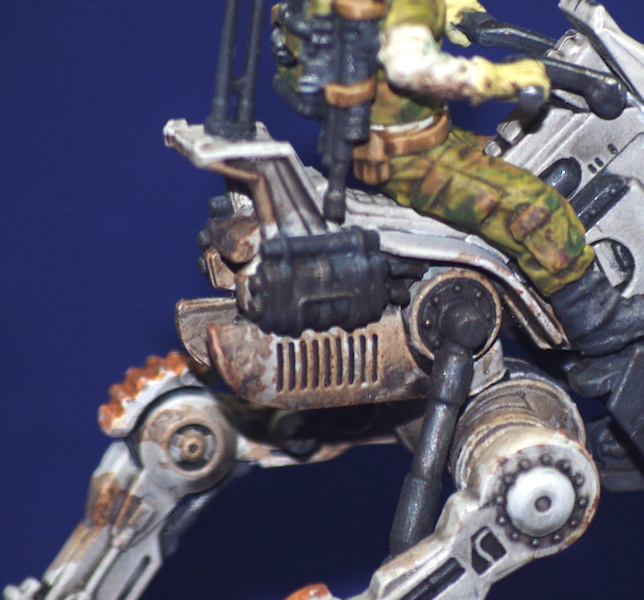
The Laser Canon is affective at ranges 2-4, and is an ideal armour buster. Using 1 red die and 2 black, it also has impact 3, so it is best deployed carefully at range against the oppositions armoured units, as you don’t want to be overwhelmed by trooper units.
Offering yet another different approach is the Rotary Blaster. 5 black attack dice at range 1-3 make this a versatile killer, especially when defending a tactical position against swarms of troopers, though it is equally at home when advancing alongside your own trooper units, keeping the heads down of the defending units.
Of course, all these hard point weapons have a fixed front arc, so they are vulnerable from rear attacks, and that’s where the A-300 Blaster Rifle comes in. It’s the AT-RT operator’s personal weapon, and can be fired at anything in the 360 at range 1-3, but only uses 2 white attack dice so it really is a last resort!
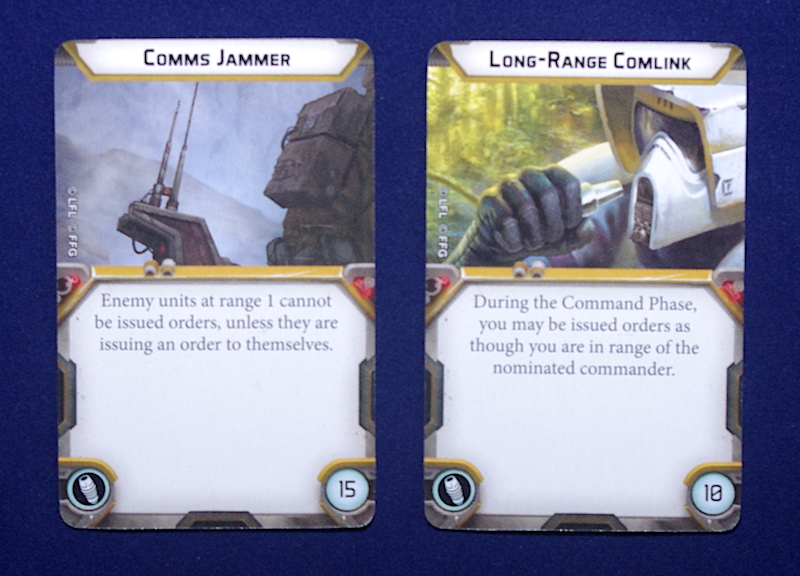
Let’s not forget the AT-RT also has an attack surge conversion, which complements its aggressive nature, and finally it can also be equipped with a comms upgrade; in the core set your choice is limited to just a Long-Range Comlink, which is actually quite useful as it enables the unit to be issued orders as though it were in range of the commander. (In the AT-RT expansion you also get the Comms Jammer upgrade card, which prevents enemy units within range 1 from receiving orders!)
Overall, the AT-RT is an interesting unit – Its cost, with upgrades, is comparable to the Empire’s Speeder Bikes, but they’re two very different units. The AT-RT is definitely best used in support of other units; either advancing near the front when using the Flamethrower, within the midst of the troopers when using the Rotary Blaster, or behind when keeping enemy armour at bay with the Laser Canon – if singled out it can be easily overwhelmed and brought down.
Painting
All paints used are Vallejo unless otherwise stated.
As always with the painting of my Legion core set, credit has to be given to Sorastro’s painting guide, which I used as a reference for colours and techniques.
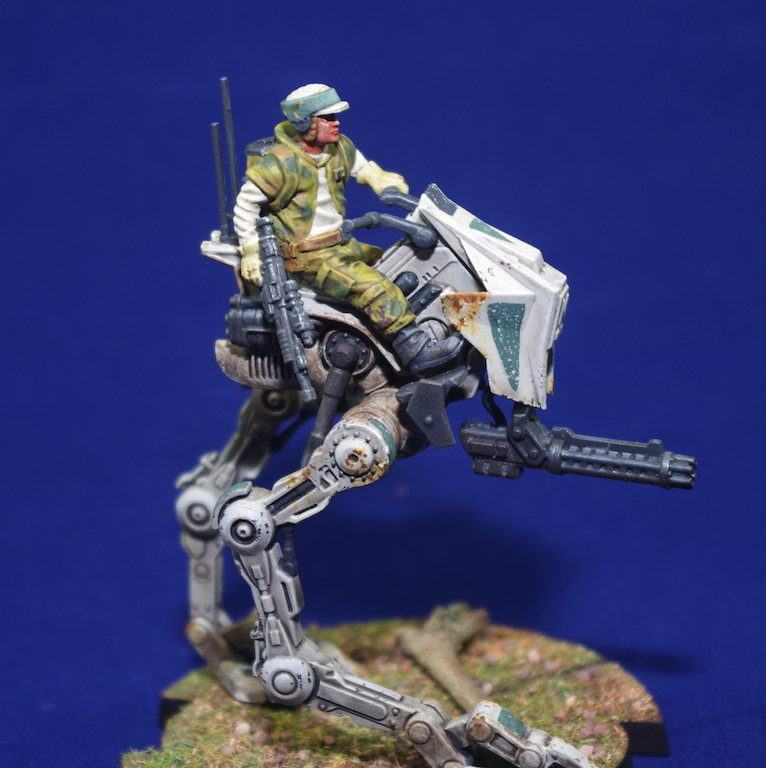
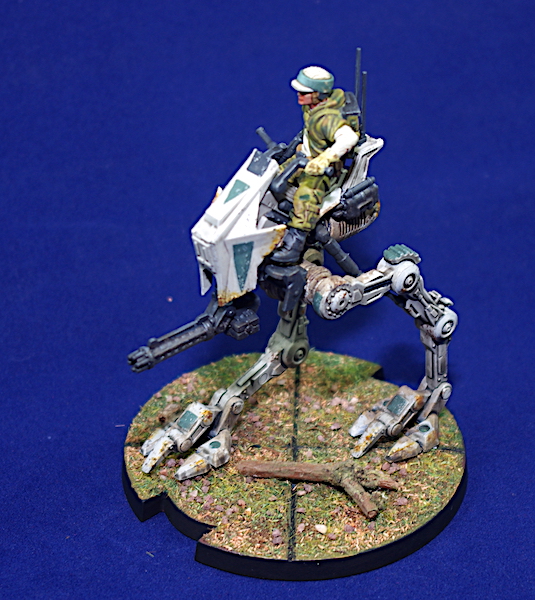
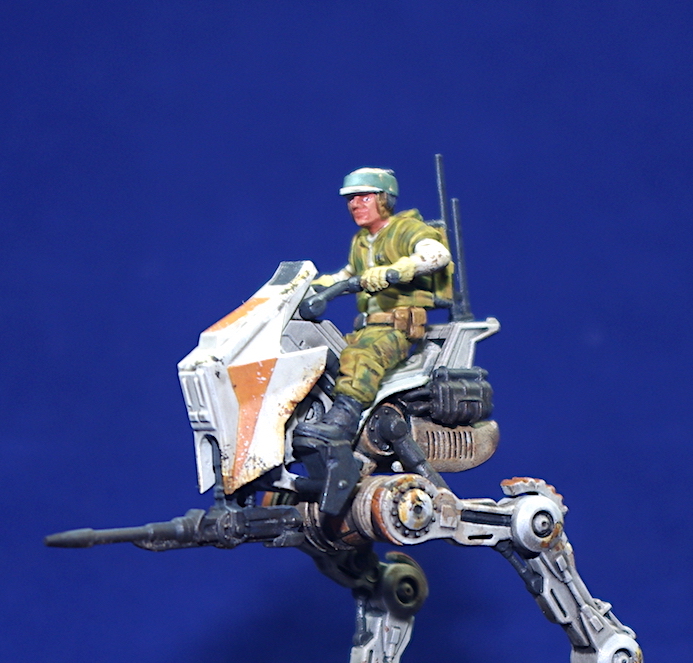
Of the entire core box, the AT-RT has been my favourite miniature to paint. The way it all came together was very pleasing, especially the weathering effects, and the model has a great presence on the tabletop.
I started by priming black and then added some Zenithal highlights in grey and then white.
For a base coat I mixed Deck Tan with Chainmail in a 3:2 ratio, thinning it down to quite a thin consistency. This I applied with a flat brush in downward strokes, almost like I was drybrushing. I deliberately wanted quite a thin layer, allowing the Zenathal highlighting to show through.
On the finished product this is difficult to make out, but at the time it is quite noticeable and helps as a guide to applying highlights, as we shall see.
The next step was to add some white edge highlighting, and this is where the above step proved useful. I could see the Zenathal highlighting through the basecoat and so used this as a guide. The white is applied very sparingly, and again a thin paint consistency was used. For the round mechanical joints the paint was applied to the top 180 degrees, pushing the paint pigment towards the 12 o’clock position. This technique requires a bit of practice, and it really comes down to the consistency of the paint – too thick and you won’t achieve the blended appearance.
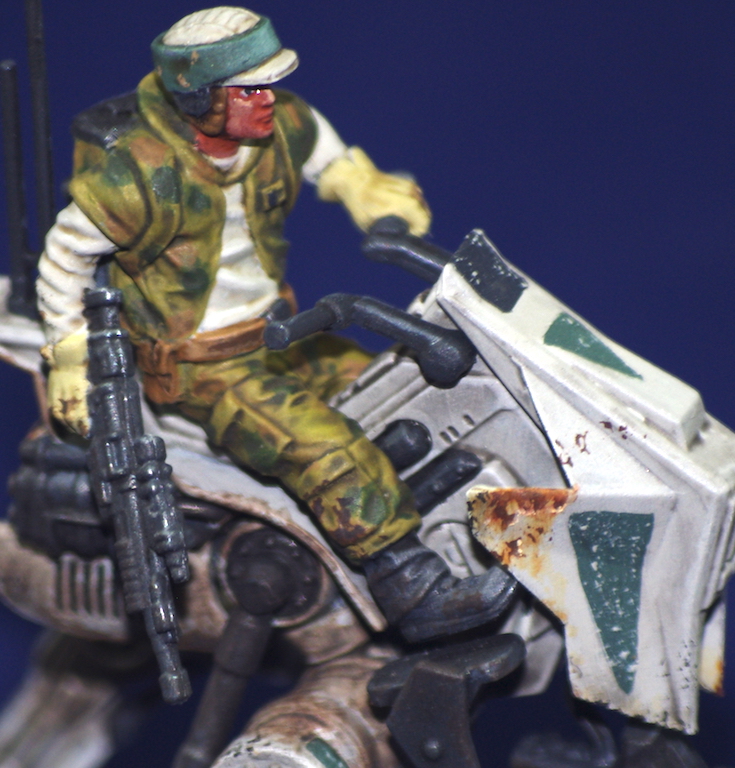
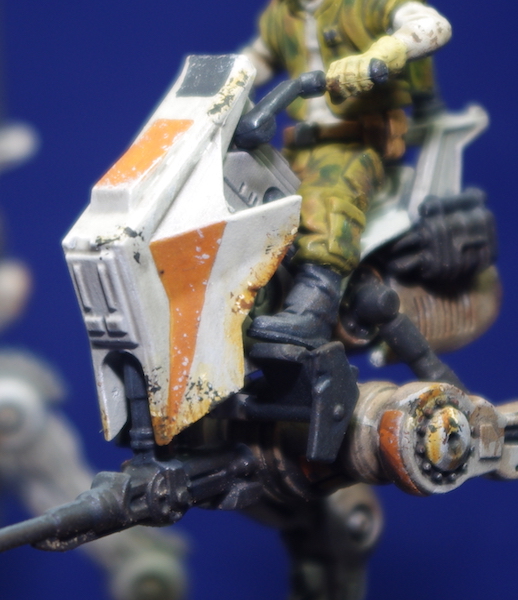
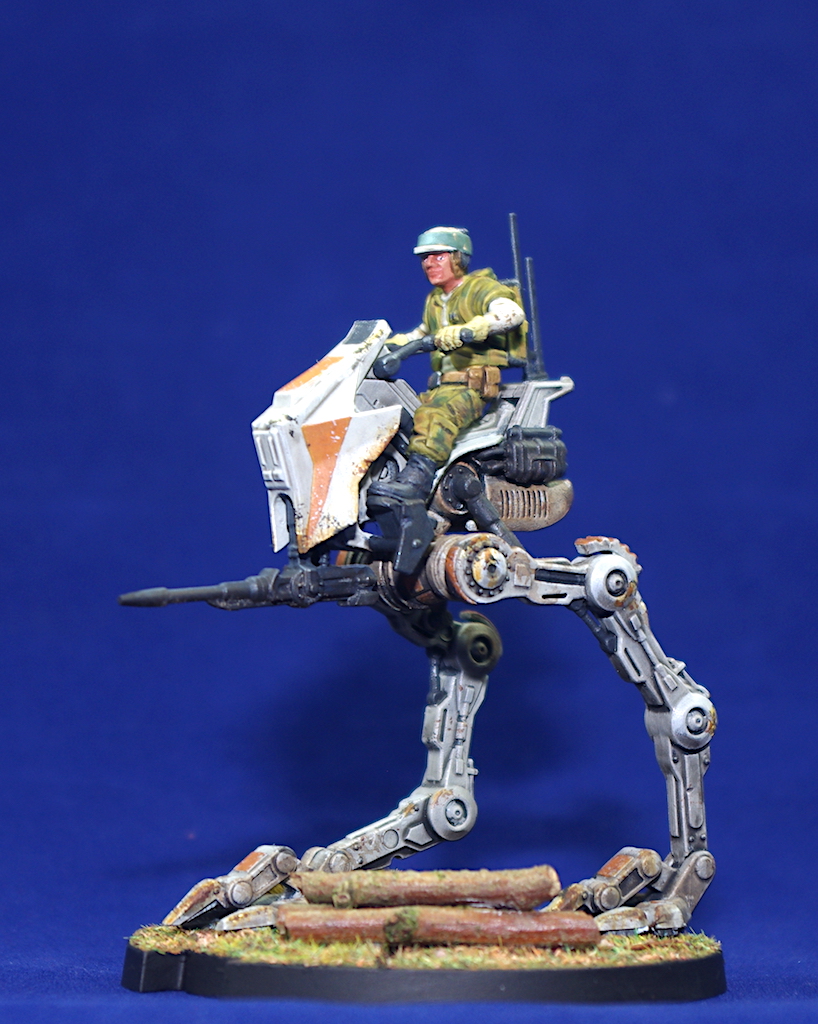
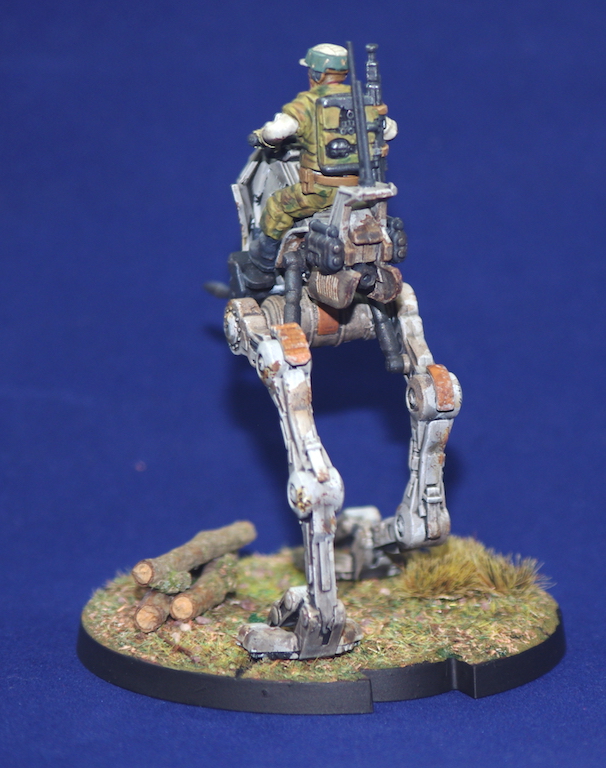
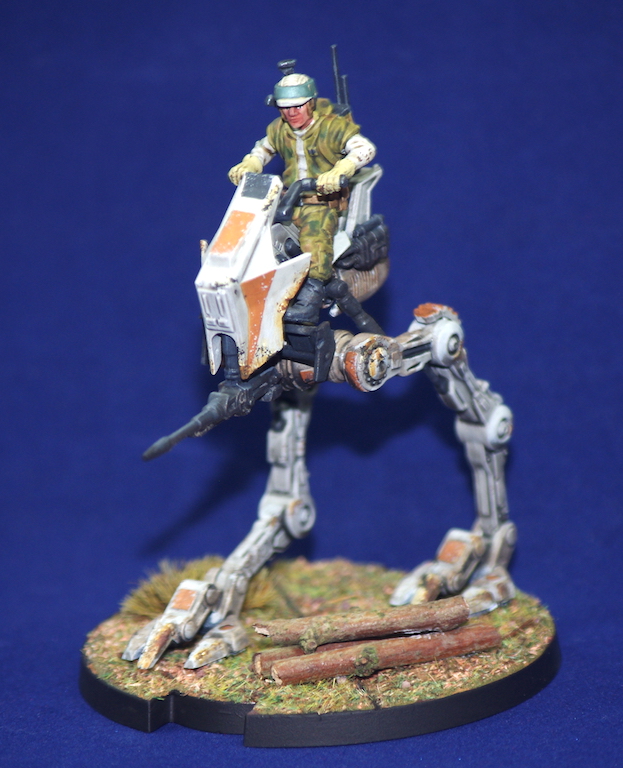
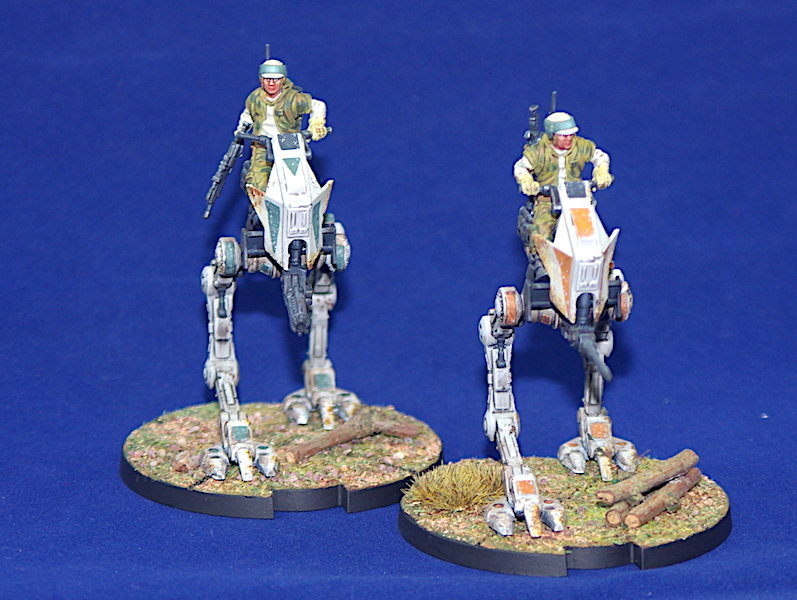
Time for a bit of free handing next, as I painted the designs on to the front panelling; just simple shapes to give the unit a form of individuality and identification. I used German Uniform on the core set AT-RT and Parasite Brown on the expansion one. I also painted a few squares on the feet and legs.
The little windshield was painted using Black.
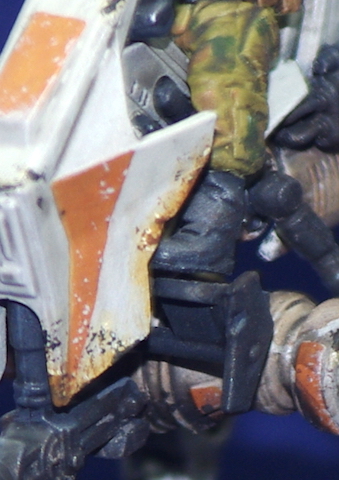
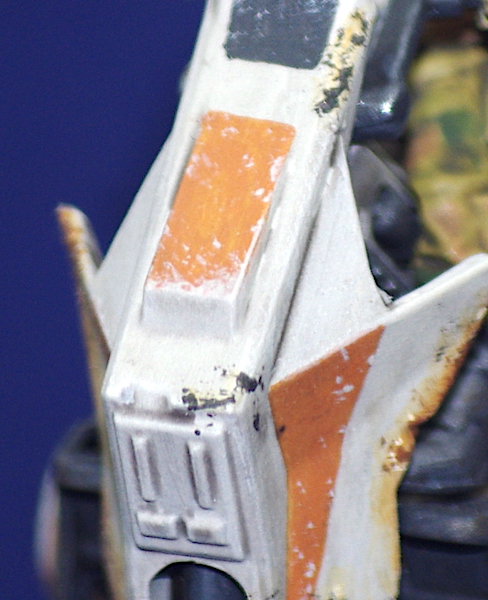
Taking a small piece of sponge I dipped it in the original Deck Tan mix, blotted it on a piece of paper until I felt it gave a pleasant effect, and then used this to apply some chipping effects to the designs I’d just painted.

The weapons, which I painted separately, were base coated with a 50:50 mix of German Grey and Gunmetal. I also applied this to the handles, struts, and a few other incidental parts of the model.
Everything was then washed in Nuln Oil, gently wiping it of the highlighted areas using a cotton bud. Where necessary I re-applied some of the highlights with the original mix.
The weapons and other black metallic parts were highlighted using the same Black/Gunmetal mix, to which I added a small quantity of Chainmail. I think I could have applied a further highlight, again lightening it with a little more chainmail.
I then glued on the Rebel operator, who had been painted in the same manner as the rest of the Rebel Troopers.
Weathering
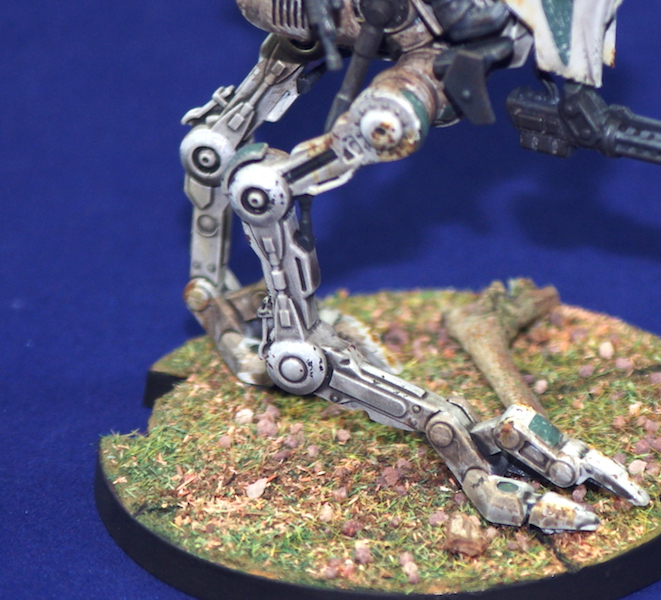
Using a sponge, I again added some chipping effects, this time to selected areas all over the figure – front panel, feet, leading edges – using a mix of Black and Gunmetal.
Next it was time to add some rusting. For this I first added some Red Rust (From Vallejo’s Panzer Aces range) mixed with a little Typhus Corrosion (Citadel). The Typhus Corrosion adds a gritty texture to the paint that goes nicely with the rusting effect. This was applied with the sponge to a few prime areas where I though rusting would occur.
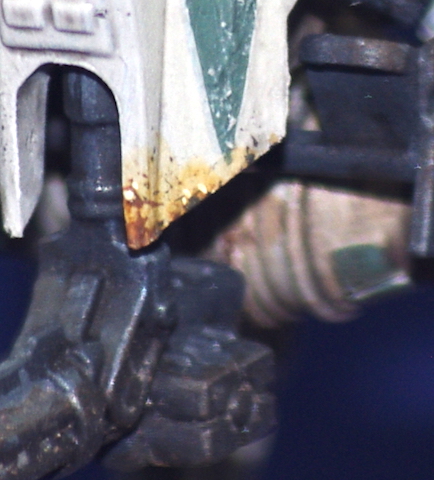
Over this I added dots of Vallejo Air Orange rust using a brush, careful to leave an edging of the Red Rust visible.
Using Vallejo’s rust wash, thinned down a little with water, I added some streaking effects to the panels.
Mixing Deck Tan with White I went around putting some tiny dots to represent peeling paint – I really like this effect – I then lightly washed over all rust areas with the rust washed, again thinned down slightly.
Finally, I added some mud splatters to the feet and lower legs using Typhus Corrosion, which I also dabbed on the boots of the rider, and then thinned it down to use as oil deposits around the engine areas.
The base was created in the same manner as with the Stormtroopers, and then the AT-RT was glued to it, rather than fixing the model and then adding the basing material. The whole thing was then sprayed with several thin coats of Matt Varnish from Vallejo’s Mecha range, an excellent varnish that has been designed for use with an airbrush, and it gives a wonderful flat matt finish.
The hard point weapons have been fitted with Blu-Tac, so can easily be swapped out if required.
In the end…
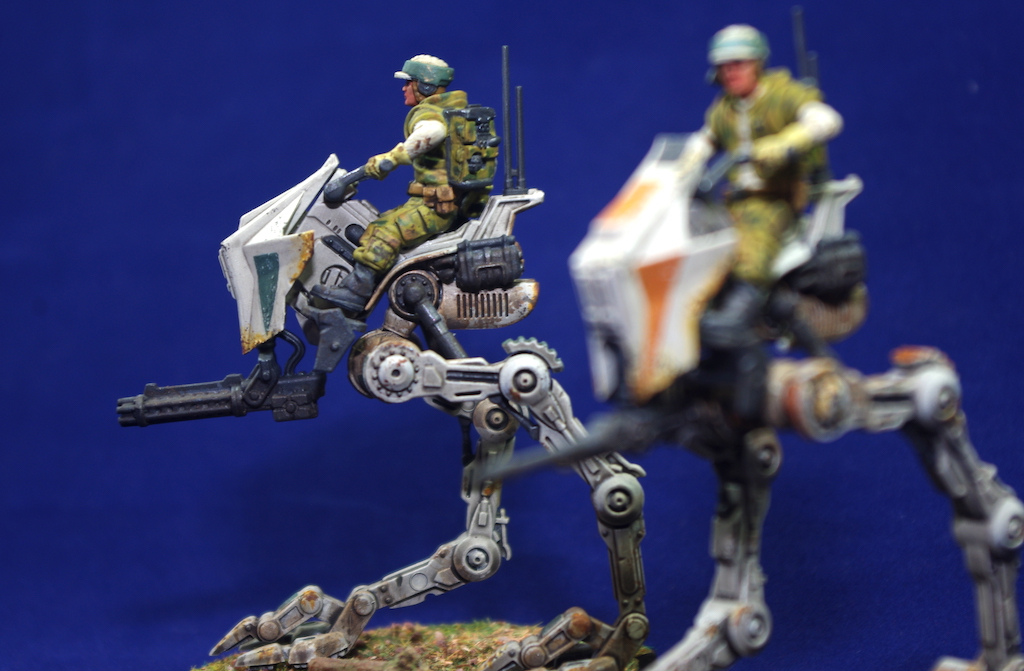
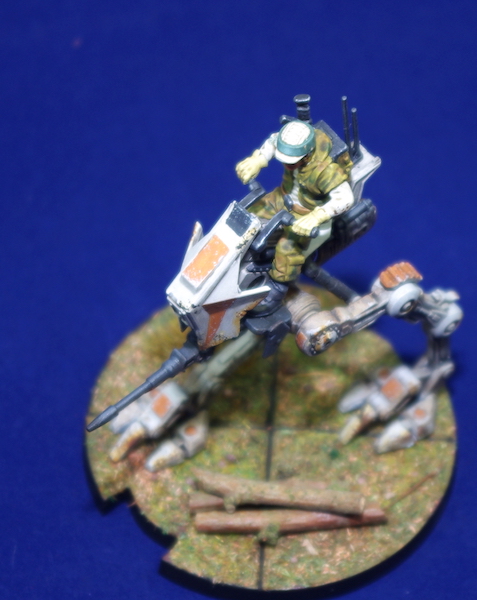
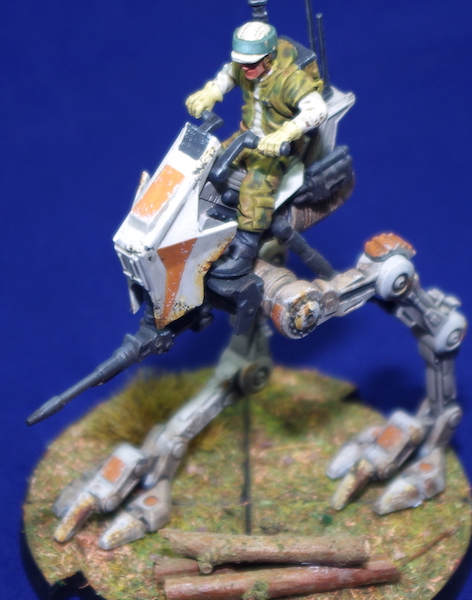
As I said, these were most enjoyable to paint and are my favourite of the Legion miniatures I’ve painted so far. It’s nice to see that the AT-RT from the expansion is posed differently to that of the core set; well, at least the rider is – it would be nice too see a bit more variation in the stance of the mech, though it shouldn’t prove too difficult to do this ones self.
So, that just leaves the Speeder Bikes from the core set, though I now have a T-47 Airspeeder expansion to paint too, which I picked up cheap from the Expo earlier this year.
In Pictures


Justin, that is some amazing painting right there, you are very talented. Makes my painting look like a 5 year olds!. Fantastic job 🙂
LikeLiked by 1 person
Thanks, I am very pleased with how these turned out – more luck than judgement though!
LikeLike
Looking really good – so much Star Wars stuff needs that layer or wear and grime.
LikeLiked by 1 person
Thanks, Azazel – totally agree, and it makes them look really good on the battlefield.
LikeLiked by 1 person