
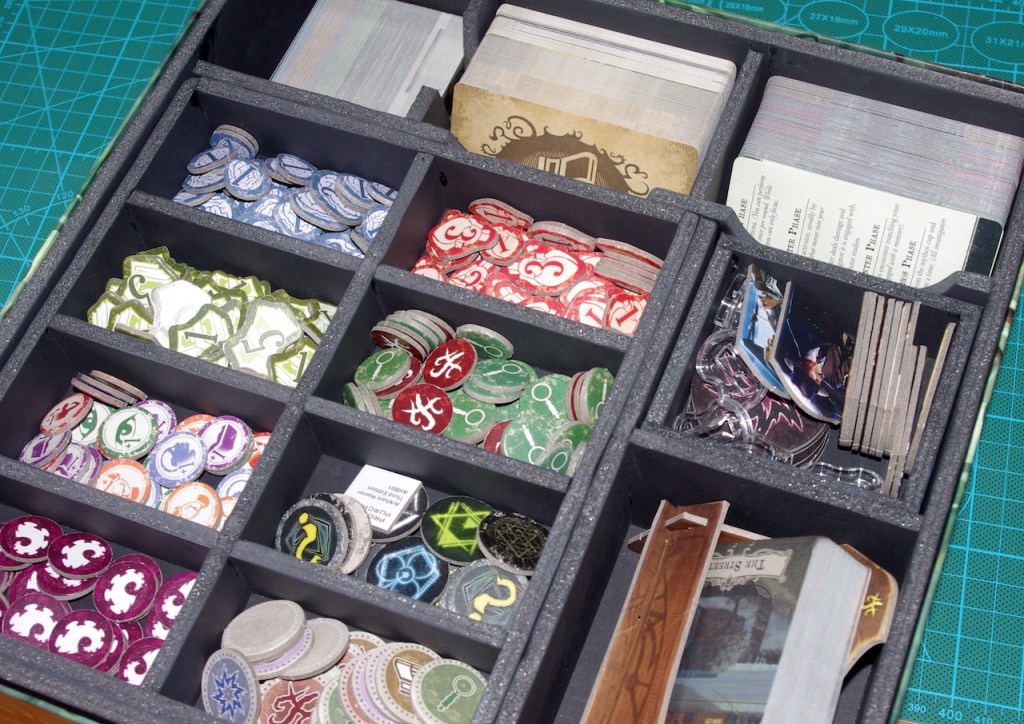
I’ve recently taken to making my own boardgame inserts out of Foam Core Board and was surprised at how easy it was to do; figuring out where everything needed to go was probably the hardest, and most time consuming part. So far I haven’t tried doing one for a big box game, such as Gloomhaven, which may present new challenges like, ‘Does it all really fit back in the box!’
Anyway, before I get around to posting the plans for the ones I’ve done, I thought it would be handy to pass on the handy tips I’ve learnt. So, here goes…
What is Foam board?
Foam Board, Foam Core Board, Foam Core, call it what you will, is basically polystyrene or polyurethane foam sandwiched between two sheets of clay-coated paper, Kraft paper or cotton archival paper.
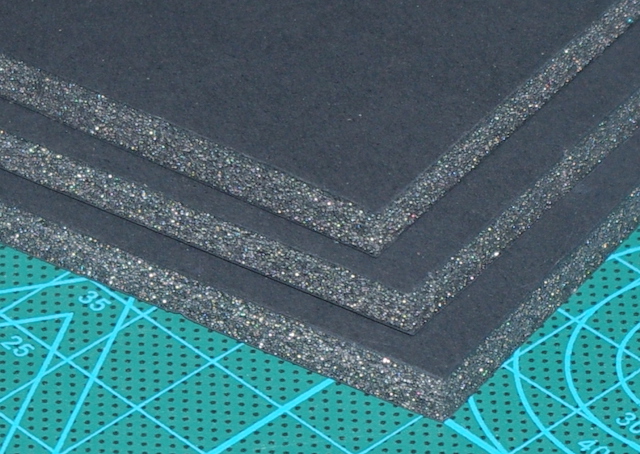
It has a wide range of uses, from photography – mounting pictures and bouncing light – to architectural design and model making. It’s easy to cut and generally easy to glue together and paint.
Foam board comes in a variety of sizes and I found the most useful to be A3 and A2, and you can get it in different thicknesses – 3mm, 5mm, and 10mm being the most common. Common colours are black and white.
Tools
Foam Board is easy to work with, but like anything, having the right tools makes the job easier. Here I’m concentrating on measuring, cutting and gluing; I’m not going to touch on painting the stuff.
Essential
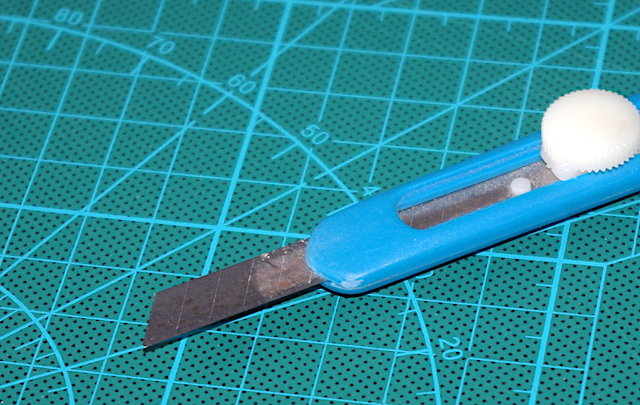
Craft knife
You’ll want a decent craft knife or scalpel, which has an easily replaceable/snap off blade. Cutting foam board dulls blades, so it’s always a good idea to use a fresh blade when starting a new project. Ideally you want one with a long cutting edge (more on this later).
Cutting mat
A good cutting mat comes in handy for more than just cutting on. Most have measurements, angles, arcs, etc. on them that can be used for measuring, and you can quickly check your board is square by lining it up with the relevant markings, always a handy thing to do when using offcuts.
Steel rule
Steel, so that you can’t wander into it when running a blade along its edge, like you can with wood or plastic, and a rule because the measurement starts right from the edge. Size will depend on project; I use a 30cm and 50cm rule for most things.
Dressmaking pins
You’ll want a fair amount of these, but they’re as cheap as chips and much more useful. They’re used for marking out and holding things in place.
White glue and brush
Polyvinyl Acetate (PVA) or similar. Ideally you want a good quality, thick PVA. Too runny and it will easily be absorbed by the foam and not form as strong a bond; it’s also more messy. A thick glue will give a stronger bond and you’ll use less, as well as make less mess. I use Gorilla Wood Glue, which is a type of PVA but has the benefit of being waterproof. It also gives a very strong bond and dries quickly.
If you’re using a different type of glue then test it on the foam first, as many solvent-based glues just dissolve it.
You’ll need an old brush for applying the stuff with. A small one for joining the edges and a large one if you plan to glue boards face to face.
Tip – If your PVA is on the runny side, decant a little into a jar and leave the lid off until it thickens – this may take some time!
Cloth
A damp cloth to wipe away excess glue. Though PVA usually dries clear, it can leave stains on the paper so remove it as quickly as you can.
Optional
Square/Triangle ruler
I use an old 90° triangular ruler from a math set, it’s ideal for checking joints are square. I also use it to place pins for interior walls to butt up against – I’ll cover this in the next section.

Whilst an engineers square will work for checking square that are a little heavy for what we need and don’t have any measurements on them.
Protractor
If you’re cutting angles and don’t have a cutting mat with them marked on it then you’ll probably need one of these.
Sliding bevel
If you are cutting lots of angles then one of these is a must, especially if you’re repeating the same angle over and over. You set it to the angle required and use it to mark out. They come in all different sizes but you shouldn’t need anything too big. You can always use the rule to extend any line done with one of these.

Sandpaper/Micro-Mesh
For shaping curves and general finishing of the edges. Just running it along the exposed edges will give a better finish than raw cut board. If you haven’t any Micro-Mesh then use a fine grade of sandpaper – 200 grit+.
Clamps
A set of small, quick ratchet clamps can be handy to secure joints whilst drying.

Measuring
Measure twice, cut once. It’s an old adage but one that is oh so true.
This is where the pins come in and it’s one of the best tips I picked up when looking at making things with Foam Board.
Here’s how you do it.
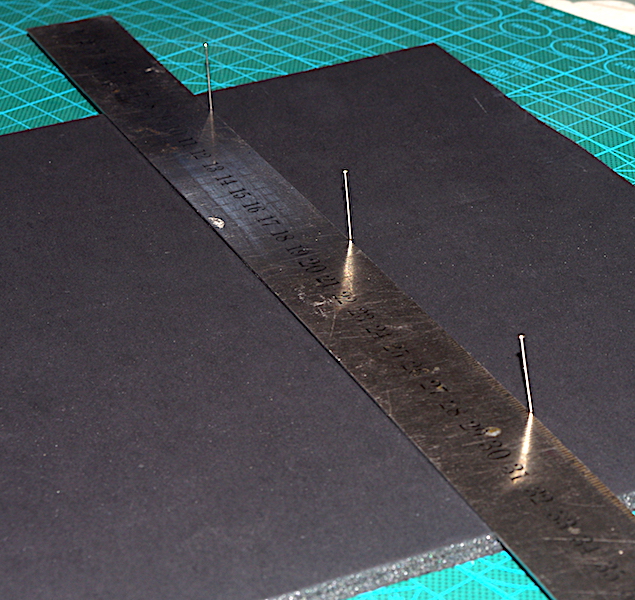
So, you want to cut a piece that’s 204mm wide. Use your rule and measure across the top, placing a pin at the 204mm point. Repeat this about midway down and again near the bottom, so that you end up with three pins 204mm from the edge.
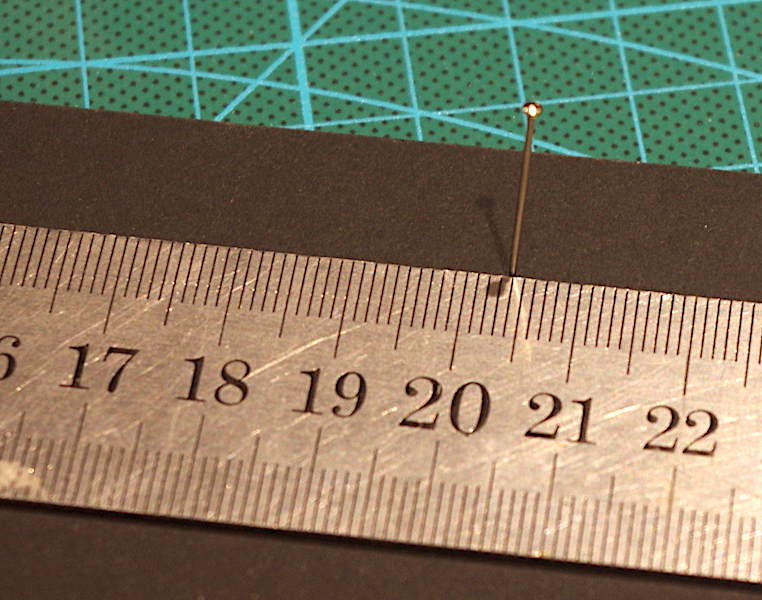
Why three, surely two would do the trick? Well, let’s see. Place your rule against the three pins; if your marking out is accurate it should touch all three pins. If it doesn’t then you’ve made a mistake somewhere, which wouldn’t have been picked up if using just two pins.
So, double-check everything. Once your rule touches all three pins it’s in the right place to make the cut. Simply hold it tight, remove the pins, and make the cut, as explained in the next section.
Curves
You could use a compass, but more often than not you’ll be placing a curve on the edge of a piece of board and if the centre isn’t on the board then it can prove awkward to mark. So far, the best way I’ve found to mark curves is using a template. Anything will do if it gives you the arc you require, just pop it in place and use a pencil to draw along it.
Cutting
Sounds simple, after all, it’s only foam and easy to cut, right?
The answer to that is no!
A blunt blade, too sharp a cutting angle, or trying to cut through in one stroke will all produce a rough cut. Also, if you don’t take care you’ll end up with a sloping cut, which is no good when you want it to sit nicely at 90° when gluing.
Here’s how to ensure a nice clean, straight cut.
First, ensure you have a nice sharp blade – it should slice through a sheet of paper with no effort at all.
To get a nice, 90° cut it’s important to get your positioning correct. You need to be over the blade, looking directly down on it. This way, as you draw the blade along the rule you can ensure that the blade keeps vertical and doesn’t lean over to the side. Your cut should then be square with the board.

When you draw the blade along the rule don’t force it, don’t try and cut through it all in one go. Let the blade do the work and take two or three runs to cut all the way through, it’ll prevent pulling and roughing up the edge.
Remember when I said you ideally want a blade with a long cutting edge? Here’s why. You want to let the blade do all the work and a long edge, presented at 45° will give a nice progressive cut. This will ensure a nice clean edge as the blade gradually increases depth rather than pulls through at a steep angle.

Curves
So far I haven’t found a good method for cutting curves. Trying to run a blade, using the above method, along a curved template works to a degree, but as the blade is a straight edge it’s difficult to get a smooth, curved cut and tends to come out jagged.
The best I’ve come up with so far is to saw the blade through from an edge, following a pencil line, and then smoothing of with Micro-Mesh.
If anyone has a better method please let me know.
Joining
You have everything marked out and cut to size, now it’s time to join it all together. What could be easier?
This is the fun part, as you see your creation come together and of course, you want it to stay together when you’re done.
I’ll reiterate, getting the right glue is important, so if unsure check it on some scrap board. Even if using PVA it can help to do a test and get to know how it behaves.
If you’re totally new to this kind of thing then I recommend using a thinner PVA, as it will give you a little more time to adjust when sticking things together. The Gorilla glue I use dries very quickly, especially as I decant it to thicken it up even more, so I don’t get a lot of time to get things right. It does, however, mean I can get on with things rather than have to hang for it to dry.
I run a bead all the way along the edges I wish to stick, and I apply it quite liberally, as the foam will soak it up. This is what you want to happen to a degree. The glue sucked into the foam will harden and make a stronger bond, but if the glue is too thin then there won’t be enough left at the actual joint to make it a strong join; it’s all about practice.

There are a few things you can do when offering the piece to be stuck to ensure a good join. If using thin, runny glue, rub the board back and fore until the glue becomes ‘grabby’ and then get it into final position. This works well for long edges of boxes but can backfire, as the glue suddenly grabs when you’re way out of position and by the time you’ve got it right the glue has dried; it can also spread the glue where it’s not wanted.
You can use clamps to hold the board in position, but you have to be careful here. Too much pressure will bend the board and pull it out of square as well as leave indentations. Best used on long runs where you need an extra set of hands.

Pins are probably the best way to hold things in position. Push them through the board and into the piece being stuck on, however, don’t go in straight. Use at least two pins pushed in at opposite angles, ensuring the board is pressed firmly together when you do. This will hold the board in position, as the angled pins won’t allow it to pull away as straight pins would.

Finally, check square using the triangle ruler and if all is well clean any excess glue with a damp cloth.

How I do internal walls
When you need to put dividers between walls, such as to separate card decks, then here’s a handy way to mark out their position.
You’ll need the triangle ruler, rule and pins. Place the triangle ruler on the inside, flat against the sidewall approximately where you want the divider to be.

Now, place the steel rule along the top edge of the sidewall, measure along to the point you want your divider and line the triangle up with this point.
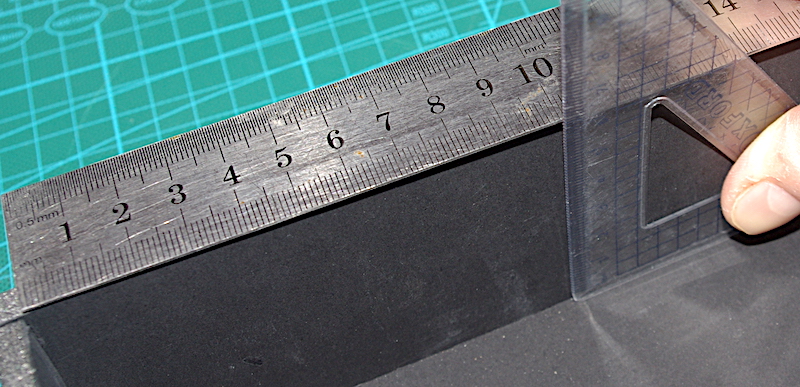
Press the triangle against the sidewall and remove the rule. Push two pins into the foam core butted up against the edge of the triangle.

Repeat the process on the other sidewall. You now have pins marking out where the edge of the internal wall will go. Apply glue and insert it butted firmly up against the pins. Check square with the triangle and leave to dry.

So, that’s it, all the tips I’ve picked up for working with Foam Core Board. Hopefully they prove useful to someone out there.
I’ve recently found an app to put measurements on images and am in the process of making up some simple plans of the inserts I’ve done. I’ll post these as and when they’re complete.
In the meantime I have another dozen or so to make, including some big box ones – Gloomhaven, Joan of Arc – so that should keep me busy – like I need anything else to distract me!
I did actually enjoy making them, especially the planning of how to fit everything in the box, and the two I’ve done were completed in two evenings apiece, about a total of 4-hours each, so they’re actually quite quick to make.
Now I’ve being using them in anger I wonder how I’ve lived without them. Set-up/pack away time has been drastically reduced for the two games and it’s probably led us to play them more. Maybe I need to do something similar for my daughter’s chest of drawers; she might be more inclined to put her clothes away then!

You obviously have an engineer’s patience and thoroughness! I can see this being used to build wargame scenery as well, if the boards that sandwich the foam core have a paintable surface?
LikeLiked by 2 people
Thanks hexeres.
Yes, foam core can be used for scenery, no problems.
Paint wise, I’ve found it takes acrylics well and have used household emulsion on it too. You just have to make sure the initial coats aren’t too thin, otherwise they’ll be absorbed into the paper causing various issues.
The foam itself seems to take acrylic paint okay, though I haven’t experimented much… yet!
LikeLike
Justin, this is a fantastic tutorial, I have used foam core a few times but there are very useful tips here that I hadn’t thought of .
I really like the using of the pins to mark the “dividers” accurately .
I also use the gorilla glue and have used hot glue gun in the past .
Hot glue gun is instant grab but you have to be very careful not to melt the core of the foam by lingering along an edge!.
I found a lolly stick worked well for spreading the thick gorilla wood glue along the edges.
I have not tried circular cuts in foam core but I had a project once to cut out circles in thick foam and a kitchen electric knife did this perfectly . I imagine the fine cutting blade would work well with foam core.
An electric jigsaw with scroll cutting blade could work well also.
Have you found a good source for the foam core?.
Brilliant tips and tricks.
Thank you 🙂
LikeLiked by 2 people
Thanks Mark, glad you found some of it useful.
I’ve got a hot glue gun but just can’t get on with it. It might be my impatience in not letting it get hot enough – it’s only a cheap one – but I find the glue unworkable and dries almost instantly.
A scroll saw would probably be good; I’ve considered getting one in the past for various projects, though I fancy a laser cutter now, then I could turn to using MDF instead!
I get my foam core from Amazon. I found some better than others, especially as far as packaging was concerned, but eventually found a reliable source – I’ll dig through my orders and let you know.
LikeLike
Pretty comprehensive tutorial there, Justin! 🙂
LikeLike
That’s clever, i will steal your idea sooner or later 😎
LikeLiked by 1 person
Genius!
Great for all types of storage!!!!!!
LikeLiked by 1 person
What…no mortis and tennon joints?
LikeLiked by 1 person
Lol!
I’m a slow enough worker as it is… you expect to much Ian.
LikeLike