
Picking up the brush is a miniatures painting series aimed at the complete beginner.
I’ll be running through all the steps required to do a reasonable job of putting paint on plastic (or metal!). I’ll be pointing out all the mistakes I made (I’ve only been painting just over a year myself!), along with all the good tips I’ve picked up. I’m by no means an expert, pretty average Joe really, but hopefully we can learn a few things together.
In this part, I’m going to give a basic overview of some of the techniques used to get the paint off your brush and onto your miniature. I don’t intend to go too deep into any one technique, as trying to explain everything in one post would just be too much.
Once I’ve concluded my ‘Picking up the brush’ series, one more part to go (finishing and basing), I will start to do a beginners guide to painting specific miniatures, and I will cover the techniques I use in more detail then… hopefully!
There are a lot of different techniques open to the beginner; some are simple yet effective, whilst others require a lot more time and perseverance but do produce stunning results. Part of the learning curve is knowing what technique to use where, and that will only really come with experience. Practice, practice, practice, and you will improve!
Before we look at the techniques there are a few important things for the beginner to consider:
- Type of brush – There are various different types, or style, of brush – Round, flat, and drybrush are the most commonly used, and they each have their uses.
- A round brush, which is simply the term given to what you would consider a normally tipped brush, is one that comes to a nice point, and is used for the majority of paintwork, especially detail.
- Flat brushes are exactly that, a flat, wide brush, and have a number of uses. They can be effectively used as a drybrush, mainly when you want to apply highlights coming from a certain direction, and large flat brushes are good for applying paint to a large area, especially a large flat area.
- Drybrush is actually a technique, and I’ll cover it a little later, but many companies now produce brushes specifically for drybrushing. They tend not to come to a point, though do have a round profile – imagine taking a standard round brush and cutting the point off! They also tend to have harder wearing bristles, as the technique is quite damaging, but you can use any old brush with a trim.

- Size of brush – As a beginner you will invariably start by using a brush too small for the task, don’t worry about it; it’s natural to misjudge the size of brush you actually need and picking one you feel comfortable wielding, without getting paint all over the place. You will notice that the brushes you use will gradually increase in size, it’s a good sign that your brush handling is improving, and it has some hidden benefits. Using the right size brush, generally the largest you can get away with, speeds up painting and improves the finish. Using a small brush to paint a large area increases the number of strokes required, and all the time the paint is drying – this leads to brush strokes being visible in the finished result.
So let’s take a look at the techniques on offer…
Main Painting techniques
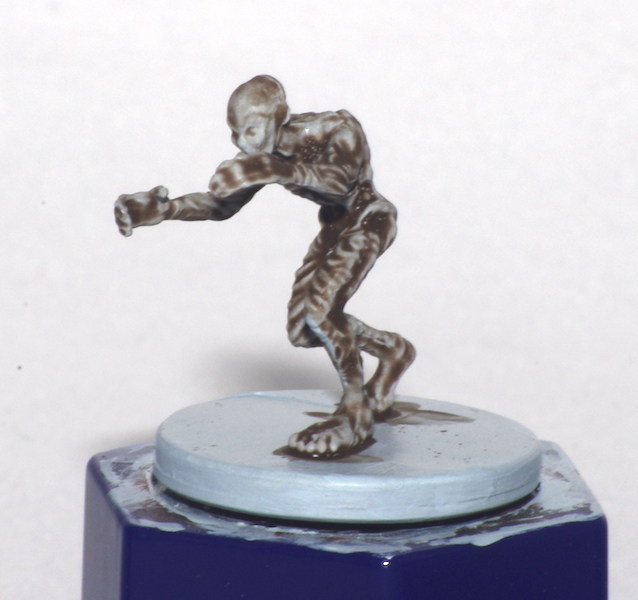
Flat Finish
This is probably how everyone who has ever painted a miniature or model before, started out. Basically painting each individual section in a single colour, applying no shading or highlights, and ending up with a flat colour.
On the whole the piece being painted probably looks ok, but dull and boring. It’s the application of all the little extra bits that make the model come alive, and give it a sense of drama.
This technique is an excellent way to start out though. It helps to improve your brushwork and offers an end result that other techniques can be used to enhance at a later date. Occasionally, a figure painted only using this technique is desirable, especially when used in multi-figure dioramas to make one figure appear different from those around it, thus focusing a person’s attention on it.
As I say, this is a good place to start and learn basic brush skills, and here are a few things to bear in mind when doing so:
- If required, thin your paint using either a branded model paint thinner, or water. If you use water it’s best to use filtered, as hard water can leave lime scale deposits in your paint. Knowing the correct consistency of paint is something that will come with experience, and remember, it’s always better to apply two coats (or more) of thin paint, than it is to apply one coat of thick.
- If you see that you’ve missed a bit, or the paint is a little too thin in one area, don’t be tempted to touch it up immediately. Wait for the paint to fully dry, otherwise you’ll leave brush marks in the finish.
- After your first attempt, take a good look over the figure. See if you’ve missed any areas, if there are any brush strokes visible in the dry paint, or if you’ve got paint where you shouldn’t – Ask yourself why these things happened, and keep the answers in the forefront of your mind on your next attempt.
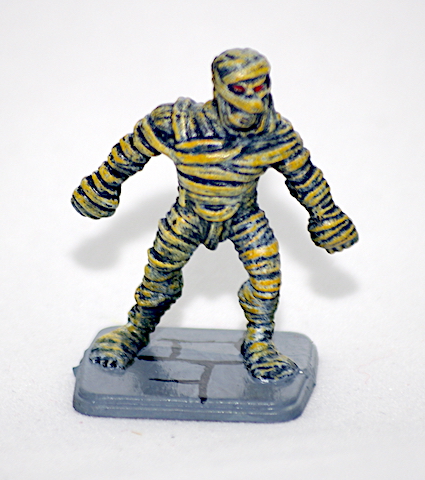
Drybrushing
This is one of the easiest methods to learn, and produces very effective results, it does have its limitations however.
This technique is best used on areas that are highly textured – fur, mail armour, and skeletons, are good examples, though it can also be used to apply edge highlights as well. It is an excellent and fast method for bringing out the textures of such surfaces.
You will need either a ‘drybrush’, or an old brush with the point trimmed off. Drybrushing is very aggressive on brushes; so don’t go using your best ones! There a quite a few manufacturers out there now who produce brushes specifically for this technique, and it can be well worth picking a few up.
Choosing the right size, as well as the right type, round or flat, of brush, will again come with experience – here are a few pointers.
- Flat brushes are better used on larger figure, but are also especially good for applying highlights on smaller ones.
- Round brushes then, are better on smaller models, or when you are applying the initial layers of drybrushing before building up highlights.
To carry out the technique, take your brush and apply a little paint to the tip. It is best to use a slightly thicker consistency of paint than usual, and work it well into the brush. Next, take a paper towel and stroke the brush back and fore on it until it appears that paint is no longer coming off it – hence the term ‘drybrush’.
Then, stroke the brush over the parts of the miniature you wish to apply the paint to. If we were painting a skeleton, for example, I may use ‘bonewhite, as my initial colour, and would apply it to all the skeletal parts by flicking the tip of the brush back and fore over them. This will leave paint residue on all the raised areas of the figure, and depending upon how dry the brush is, combined with the pressure I use behind the brush, will either be a very light covering, or a more substantial coat.

Try experimenting by changing the pressure with which you apply the paint, and also by changing the direction you stroke across the raised textures.
On our skeleton, the next layer I might apply could be ‘Elfic flesh’, which is slightly lighter than ‘bonewhite’. I may choose a small flat brush for this layer, loading it with paint as previously described, only this time I would draw the brush across the figure in vertical downward strokes only. This would apply the paint to the top areas of the raised texture only, thus giving it a highlighted appearance, as though lit from above. I would apply this layer with lighter strokes, as I wouldn’t want it to totally obscure the previous layer.
Finally, I would do the same with a layer of ‘white’, once again ensuring that it is a lighter coating than the previous one, and making sure only to catch areas that would be caught in a light placed above the figure.
This really is a basic description of the drybrushing technique, but hopefully you get the idea. Practice, as with every technique, is the best way to improve, and don’t be afraid to experiment.
One of the drawbacks to drybrushing is the ‘dusty’ finish it leaves, which can often be desirable, but sometimes it isn’t. There are a few ways around this, and the next technique is one of them.
Overbrushing
This technique is very similar to drybrushing in that it picks out raised areas, and can be used to highlight the same kinds of textured surfaces.
Using a round or a small flat brush, very lightly load the brush with paint. Then the side of the brush is gently drawn across the textured surface, picking out the raised areas. Unlike drybrushing, this doesn’t result in a ‘dusty’ finish, giving a nice smooth result, however, it does give a more distinct highlight as opposed to the more blended effect of drybrushing.

Overbrushing is an ideal way to apply final highlights, and is often used in conjunction with the layering technique.
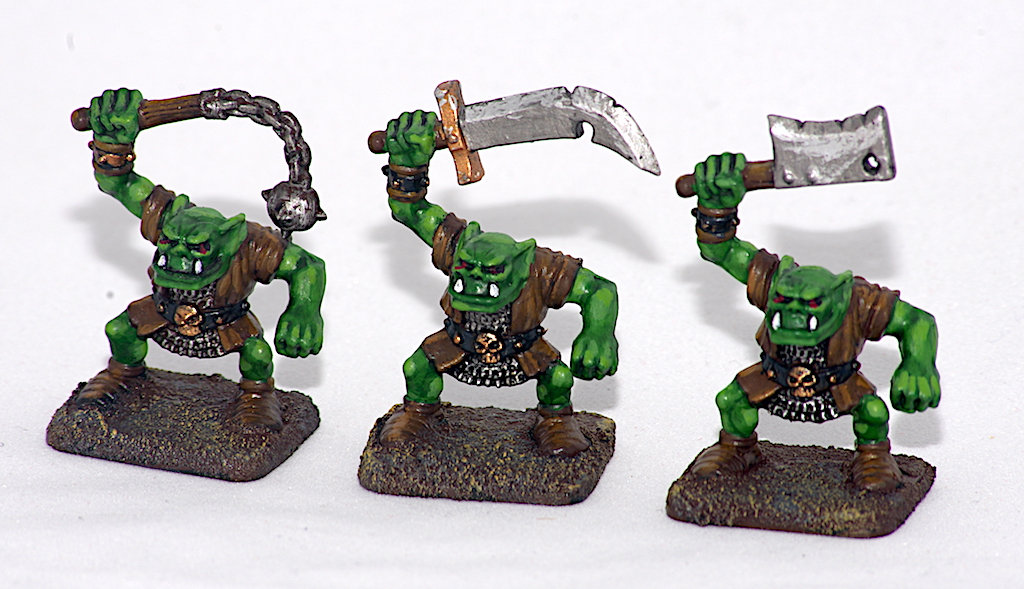
Layering
This is probably the most often seen and used technique, and at its basic level it is relatively simple to do.
Layering is exactly that – layering one coat of paint over the top of another, leaving small amounts of the previous coat visible to build up a highlight.
There are a couple of different methods for layering:
- Choose two colours, one to be the basecoat, which will provide the darkest shading in the recesses, and one to be the final highlight. It’s best if you use colours that harmonies, i.e. are adjacent to each other on a colour wheel. Basecoat the area you which to apply the technique to with your chosen colour. Next, mix your two paints together in the ratio 2:1 (basecoat:highlight), and apply another layer over the basecoat, leaving it uncovered in the recesses. For the next layers mix the paint in the ratios 1:1, 1:2, and finally paint on the highlight colour un-mixed, each time leaving a small amount of the previous layer uncovered. This method provides a graduated effect from the darker basecoat to the lighter highlight coat, and when done well, the individual layers are almost seamless. This method is ideal for those show pieces, or larger figures that the next method may not stand up so well for.
- The second method gives a more striking appearance, and is excellent for smaller miniatures; it is also easier for beginners to use, and saves a lot of time over the previous method. In this method three colours are chosen – a basecoat, a highlight, and a mid-tone of the two. The layers are applied in a similar fashion to the previous method, but the paints can be applied un-mixed, and the final layer, the highlight, is often applied sparingly to do exactly what it says, highlight! This is an excellent technique for beginners, giving really pleasing results, though it does depend upon the colours chosen, as some just work better than others. There are plenty of layering charts to be found on the Internet, and ones for this method are often referred to as ‘triads’. I really should start a chart of my own for those who use Vallejo paints.
Top Tip
When using the second method, a more pleasing result can be obtained by mixing a small amount of the mid-tone into both the basecoat and the highlight colour.
So, those are the two main methods of layering, and personally I tend to use the second method the most, saving the other for use on larger models – it is both quite time consuming and a fair bit trickier, but the results are excellent.
Feathering
Aaah! ‘Feathering’, or ‘Blending’ as it’s also known! This is a technique I’m still trying to get to grips with; it’s a more advanced method and requires a good level of brush control.
The idea is that, you paint a tiny amount of your highlight colour over the basecoat, just where you want the extreme highlight to be. Then comes the difficult part – you feather, or pull, the paint from the edges of the highlight into the basecoat, towards the recesses. The idea is that, due to the translucent nature of the paint, the highlight gradually fades into the basecoat. The paint needs to be of the correct consistency, which is a little thinner than you would normally use, and a second brush should be used to feather the paint once it’s been applied.
This technique takes a lot of time; so don’t go trying to paint a large army of miniatures with it! Also, if you were to use it on a small figure, the difference in finish between this technique and the previous ones isn’t so distinguishable – save it for those larger models, the ones you really want to make an impression with.
On the other side of that though, I do try using this technique on un-textured areas of smaller models, especially if they are curved. It gives me a little practice, and gives a really good result on rounded areas.
Other Techniques
We’ve covered the main painting techniques, but there are several others that can be combined with the above to enhance the results, or give the finished model a certain effect.
Washes
Washes are very versatile, and have few uses ideal for the beginner. But what is a wash?
A wash is usually a strong pigmented colour, diluted in enough fluid to give it an almost water like consistency.
The main use for a wash is to apply shading to recesses, as the wash runs into all the cracks and crevices of a figure, and once dry produces a ‘stain’.
A good example of using a wash would be on fur. Paint the fur area a light brown colour, and once dry, apply a dark brown wash to the whole area. When this has dried all the recesses of the fur will appear dark brown, with the raised textures appearing lighter. It’s a very effective method, however, it does have its drawbacks. Some colours work better than others, and it can take some experimentation finding out which ones work. It’s not always obvious which wash to use over which colour, and you’d be surprised how well some odd combinations actually work. It also often leaves the flat areas looking ‘dirty’, which can be either a positive or a negative, depending upon the finish you’re looking for.

Top Tip
Before applying a wash to paint in a combination you’ve never used before. Paint a little of the basecoat on to a palette, once dry coat it with the wash, this way you’ll be able to see the colour change it gives to the basecoat.
Though usually applied liberally over an area, washes can also be applied in a more controlled manner. By loading a brush with the wash, just touch the tip to the recessed area you wish to colour. Capillary action will draw the wash off the brush. I use this technique to apply weathering effect to such things like studs, crevices on metals, and around the soles of boots.
I will often basecoat a figure, then apply a wash, which will provide the shading, then highlight with the original basecoat colour. This in effect gives a shadow, a mid-tone (created by the basecoat being darkened by the wash), and a highlight.

Another use for a wash is as a stain. Paint the area required in flat a flat white, or drybrush an area with white over black. Then apply the was all over, this will stain the white area the colour of the wash, but will be heavier in recessed areas. You can apply stains over other colours, but requires experimentation, and can be a bit hit or miss.
Glazes
I’ve only recently begun experimenting with glazes, so I haven’t too much to say on the subject, but here’s how I’ve been using them.
Let’s us the example of painting a creatures horn. I have the horn base coated bonewhite; I want the tip of the horn to be red, slowly fading into the bonewhite as it moves back down the horn. I use Vallejo medium glaze, and mix it with the red paint until I get the consistency of a wash. Then, I paint just the very tip with the glaze. Once this this is dry it will be very translucent. I then apply another coat directly over the first, but this time moving a fraction of the way further down the horn. I keep repeating this until the tip of the horn is a nice, opaque red, becoming more translucent as it moves down the horn.

This is all I’ve attempted so far, with mixed results, but I’ll probably try again when the need presents itself.
Conclusion
So, there we go, a beginner’s look at the various techniques you can use on your miniatures. It can be hard to explain exactly how to carry out some of the techniques using a text format, but a quick scan of the Internet will undoubtedly reveal a video to back up understanding. Hopefully, anyone starting out in the hobby will find what I’ve written useful, and if anyone has any questions, observations, or just wants to share their own experiences, please leave a comment below.
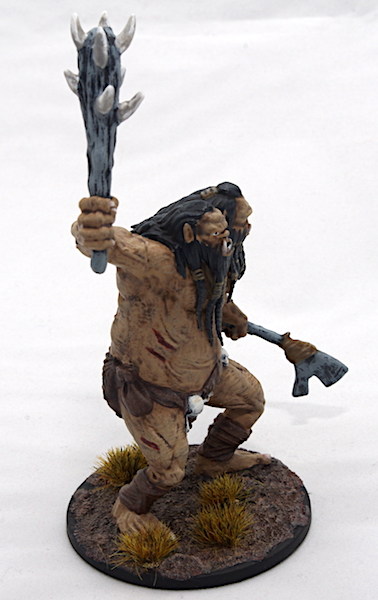
Image Gallery


1 thought on “Picking Up The Brush Part V: Techniques”